To return to your notebook, the basic steps will be:
- Start your instance
- Update the course repo
- Update the fastai library
- When done, shut down your instance
Step by step guide
Start your instance
Log in to your console then choose the instance you want to run. Tick the box, then click on the button ‘Start’ on top of the screen.

You can also click on the three dots then start in the menu that pops up. Wait a few seconds for it to be ready. You’ll get a message pop up and the little circle left of your instance name will turn green when it’s the case.

Once this is done, open your terminal and execute the following instruction:
gcloud compute ssh --zone=$ZONE jupyter@$INSTANCE_NAME -- -L 8080:localhost:8080
If your default zone is the same as the one of the instance, you can ommit the --zone=$ZONE part. Otherwise replace ZONE by the zone of your instance. In any case, replace INSTANCE_NAME by the name of your instance.
Once this is done, you can access your jupyter notebook at localhost:8080/tree.
Update the course repo
To update the course repo, go in your terminal and run those two instructions:
cd tutorials/fastai/course-v3
git pull
This should give you the latest of the course notebooks. If you modified some of the notebooks in course-v3/nbs directly, GitHub will probably throw you an error. You should type git stash to remove your local changes. Remember you should always work on a copy of the lesson notebooks.
Update the fastai library
To update the fastai library, open the terminal like before and type
sudo /opt/conda/bin/conda install -c fastai fastai
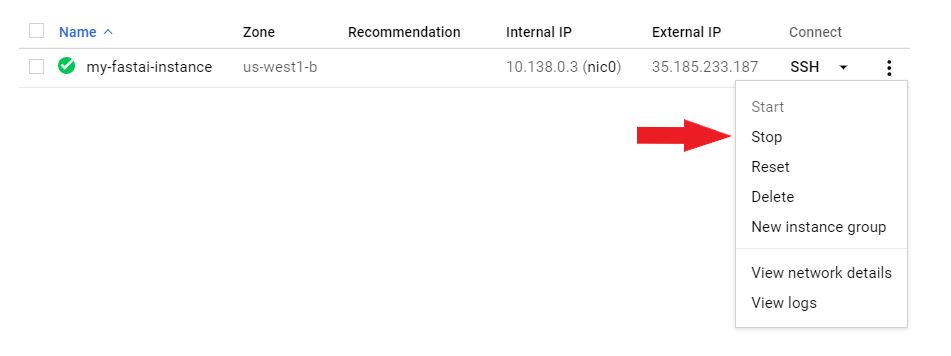
Stop your instance
Once you’re finished, go back to your Google compute console and find your running instance. Either click on the three dots then on ‘Stop’ or tick the box next to its name and click on the ‘Stop’ button on top of the screen.
NOTE: you will be charged for the time that your notebook is running. You must stop the notebook to stop incurring charges.