This is a quick guide to starting v3 of the fast.ai course Practical Deep Learning for Coders using Colab.
If you are returning to work and have previously completed the steps below, please go to the returning to work section.
NB: This is a free service that may not always be available, and requires extra steps to ensure your work is saved. Be sure to read the docs on the Colab web-site to ensure you understand the limitations of the system.
Getting Set Up
Step 1: Accessing Colab
-
First of all you should sign in to you Google account if you are not signed in by default. You must do this step before opening Colab, otherwise the notebooks will not work. You can sign in here.
-
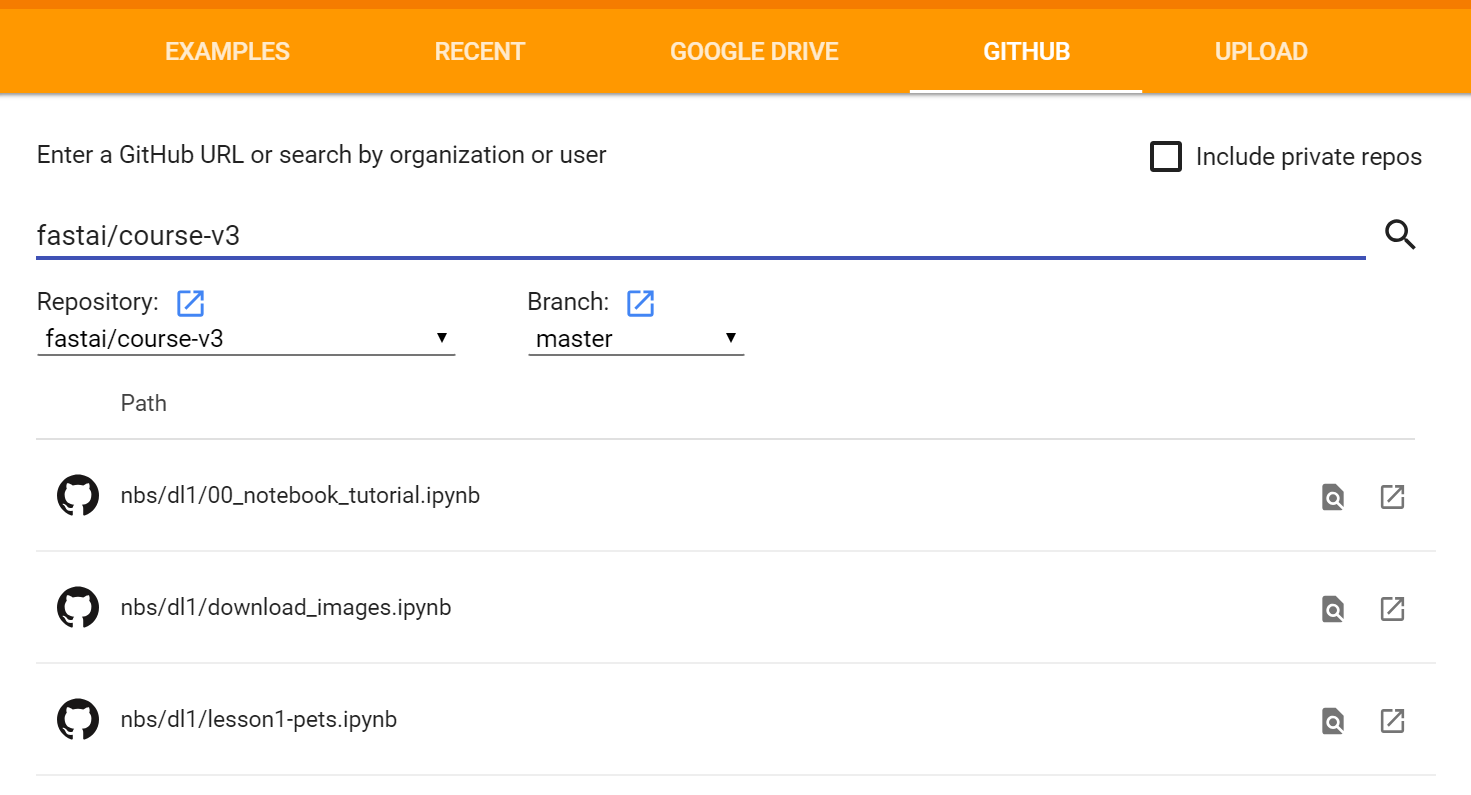
Next, head on to the Colab Welcome Page and click on ‘Github’. In the ‘Enter a GitHub URL or search by organization or user’ line enter ‘fastai/course-v3’. You will see all the courses notebooks listed there. Click on the one you are interested in using.
-
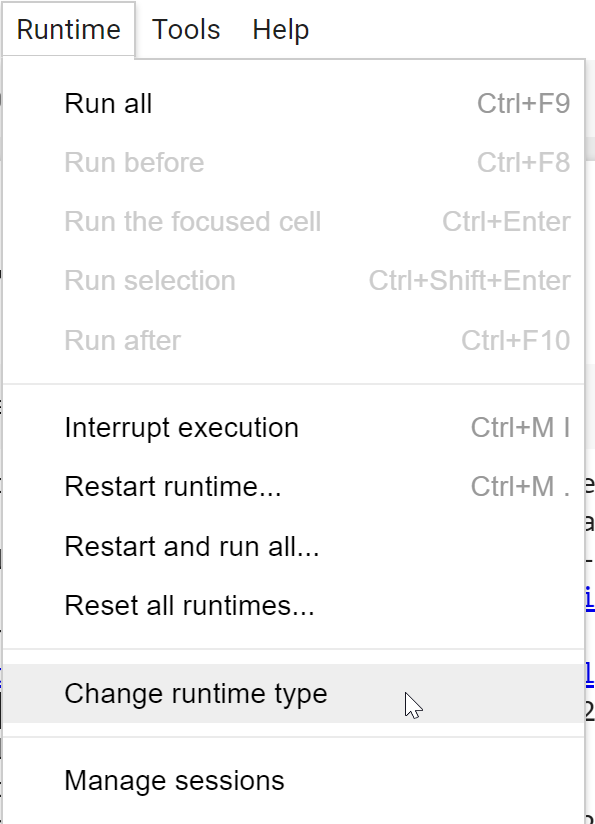
You should see your notebook displayed now. Before running anything, you need to tell Colab that you are interested in using a GPU. You can do this by clicking on the ‘Runtime’ tab and selecting ‘Change runtime type’. A pop-up window will open up with a drop-down menu. Select ‘GPU’ from the menu and click ‘Save’.

Step 2: Configuring your notebook instance
-
Before you start using your notebook, you need to install the necessary packages. You can do this by creating a code cell, and running:
!curl -s https://course19.fast.ai/setup/colab | bash -
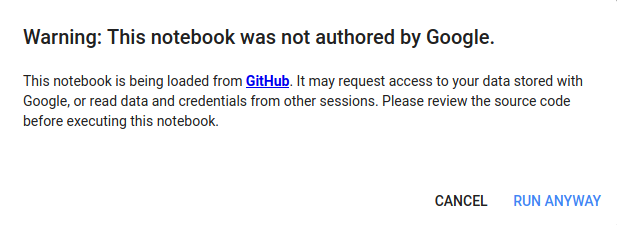
When you run the first cell, you will face a pop-up saying ‘Warning: This notebook was not authored by Google’; you should click on ‘Run Anyway’ to get rid of the warning.
Step 3: Saving your notebook
If you opened a notebook from Github, you will need to save your work to Google Drive. You can do this by clicking on ‘File’ and then ‘Save’. You should see a pop-up with the following message:
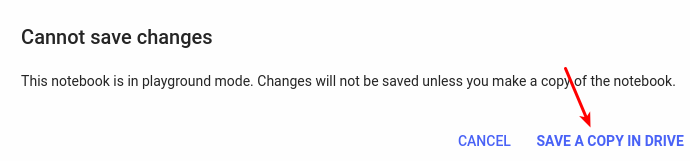
Click on ‘SAVE A COPY IN DRIVE’. This will open up a new tab with the same file, only this time located in your Drive. If you want to continue working after saving, use the file in the new tab. Your notebook will be saved in a folder called Colab Notebooks in your Google Drive by default.
Step 4: Saving your data files
If you run a script which creates/ downloads files, the files will NOT persist after the allocated instance is shutdown. To save files, you need to permit your Colaboratory instance to read and write files to your Google Drive. Luckily, Colaboratory has a UI for permanently mounting your Google Drive.
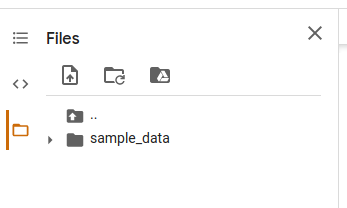
Look for the “Mount Drive” button on the Files sidebar:
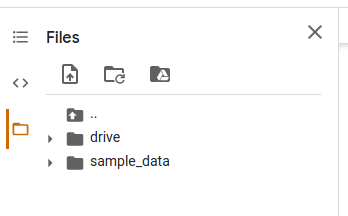
After clicking the button you’ll be asked to authorize Colaboratory to access your Google Drive. Once you do, your notebook will automatically mount that drive whenever the runtime is loaded, and the sidebar will show the contents of your drive. You can always choose to unmount the drive if you wish:
Accessing data on your drive is then simply a matter of pointing at the right path. Add the following code snippet at the beginning of every notebook.
root_dir = "drive/My Drive/"
base_dir = root_dir + 'fastai-v3/'
Now, you may access your Google Drive as a file sytem using standard python commands to both read and write files.
Don’t forget to add base_dir before root path(s) in all notebooks. For example, in lesson2-download.ipynb 5th cell, make the following changes:
path = Path(base_dir + 'data/bears')
dest = path/folder
dest.mkdir(parents=True, exist_ok=True)
Migrating from using “drive.mount”:
- The previous method of mounting google drive, using
drive.mountis still avaiable. - If you wish to migrate a notebook from using
python drive.mountto the UI, you’ll need to changeroot_dirfrom/content/gdrive/My Drive/todrive/My Drive/.
More help
For questions or issues related to course content, we recommend posting in the fast.ai forum.