Welcome to Azure
Data Science Virtual Machines(DSVM) are a family of Azure Virtual Machine images, pre-configured with several popular tools that are commonly used for data analytics, machine learning and AI development.
This tutorial explains how to set up a DSVM to use Pytorch v1 and fastai v1.
If you are returning to work and have previously completed the steps below, please go to the returning to work section.
Pricing
We suggest using a Standard_NC6 instance in Azure which has one NVidia K80 GPU and six CPU cores. This instance will incur about $0.90 per hour of compute charges, or $0.18 per hour if you use low priority pre-emptable Standard_NC6 instances (see below for more information on this option).
Azure Subscription
Before you can create a DSVM, you need access to an Azure subscription. An Azure subscription allows you to manage storage, compute, and other assets in the Azure cloud. You can create a new subscription or access existing subscription information from the Azure portal.

If you are signing up you will also need to set your credit card details. This will be the credit card to which all the charges of the instance usage will be applied. Your sign up screen will look like:
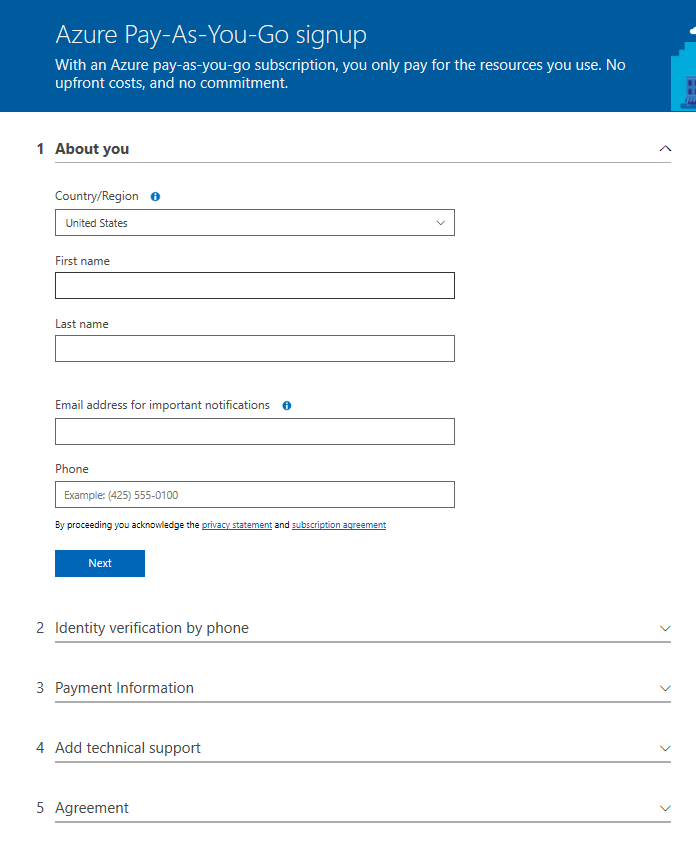
Free trials Azure subscriptions are also available though you will not be able to create a GPU based DSVM.
After your Azure account is created, you can login to the Azure portal.

Using DSVM for fast.ai
We recommend running the fast.ai course notebooks on the Linux edition of the DSVM.
- For Linux (recommended), go to create Linux DSVM.
- For Windows (not supported by fast.ai), go to create Windows DSVM.
You will see a page as below:
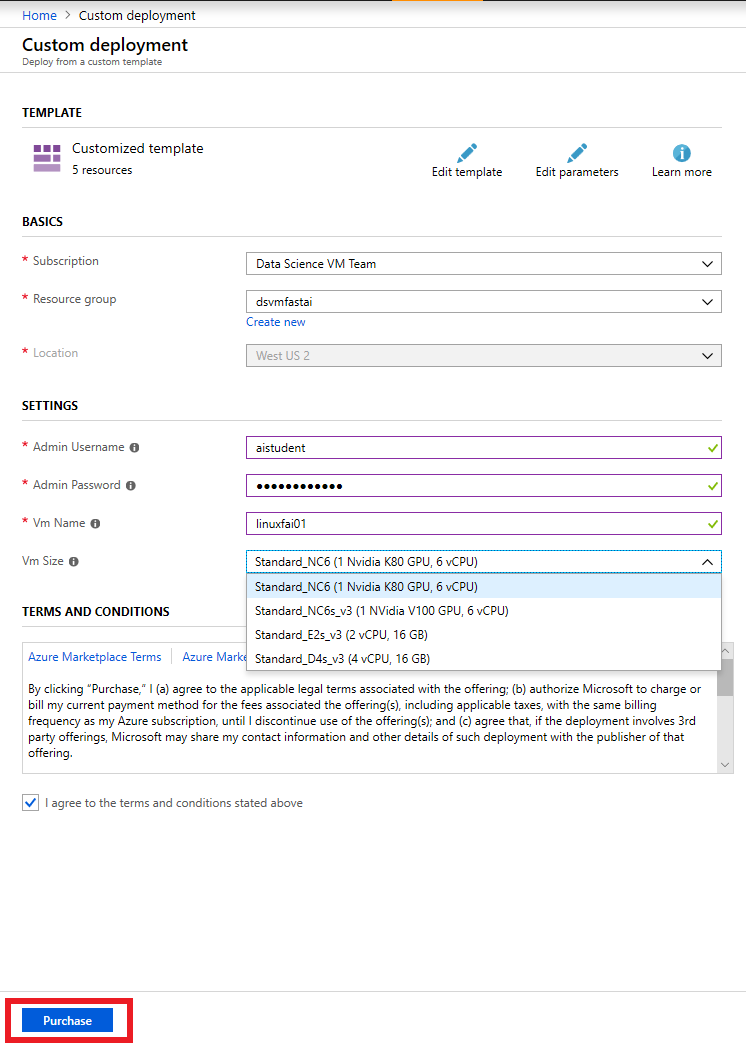
The following input is needed:
- Subscription - If you have more than one subscription, select the one on which the machine is to be created and billed.
- Resource group - you can create a new one or use an existing group.
- Location - Select the data center that’s most appropriate. For fastest network access, it’s the data center that has most of your data or is closest to your physical location. Standard_NC6 GPU instances are available in WestUS2, SouthCentral, NorthCentral and WestEurope.
- Admin Username - The admin account ID to sign in to the DSVM (make lowercase or Jupyter Hub login will fail with ‘500 Internal Server Error’).
- Admin Password - The admin account password.
- Vm Name - The name of the data science server you’re creating.
- Vm Size - Select the desired DSVM size according to your requirements and cost.
Lowering your cloud compute cost
Azure offers pre-emptable instances at a significant discount on compute usage charges compared to standard instances. These instances maybe deallocated from your subscription at any time depending on factors like demand for the compute on Azure. Sometimes if you retry after a short period or choose a different VM size you may be able to get another pre-emptable instance. Your work from the deallocated VM is not saved by default.
If you are fine with these restrictions and want to take advantage of the lower cost, go to pre-emptable Linux DSVM instance. You will see a page as below:
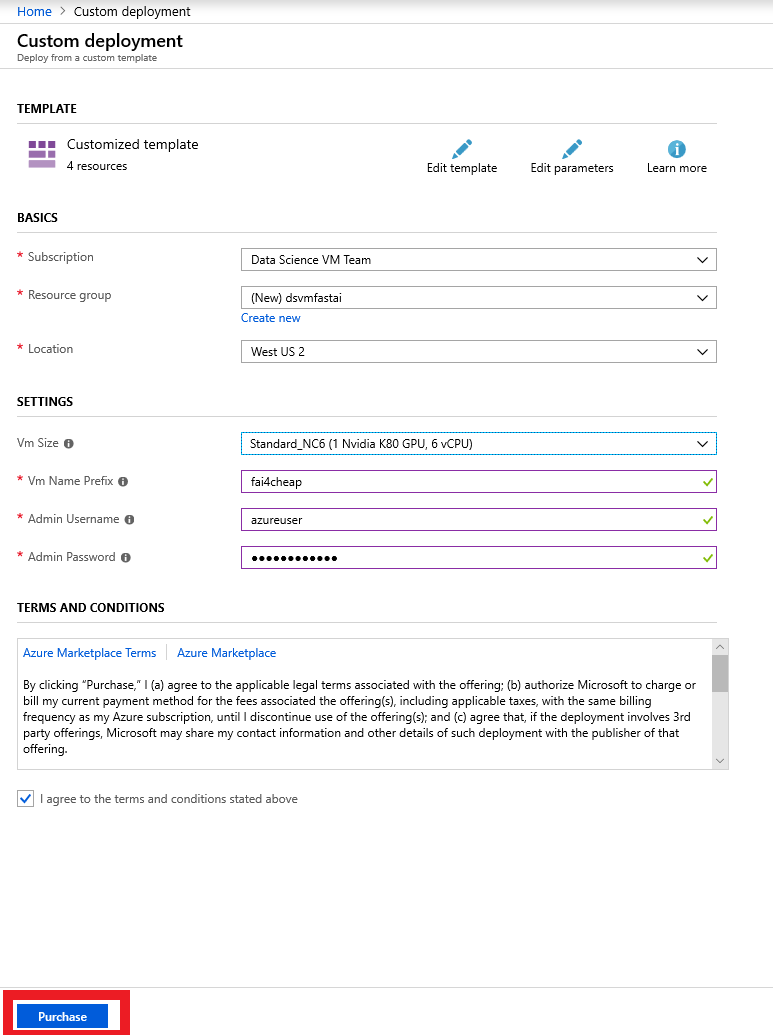
Click Purchase after filling in the fields in the page.
Connect to an instance
DSVM comes with Jupyter server pre-configured. All fast.ai course notebooks are preloaded on the DSVM.
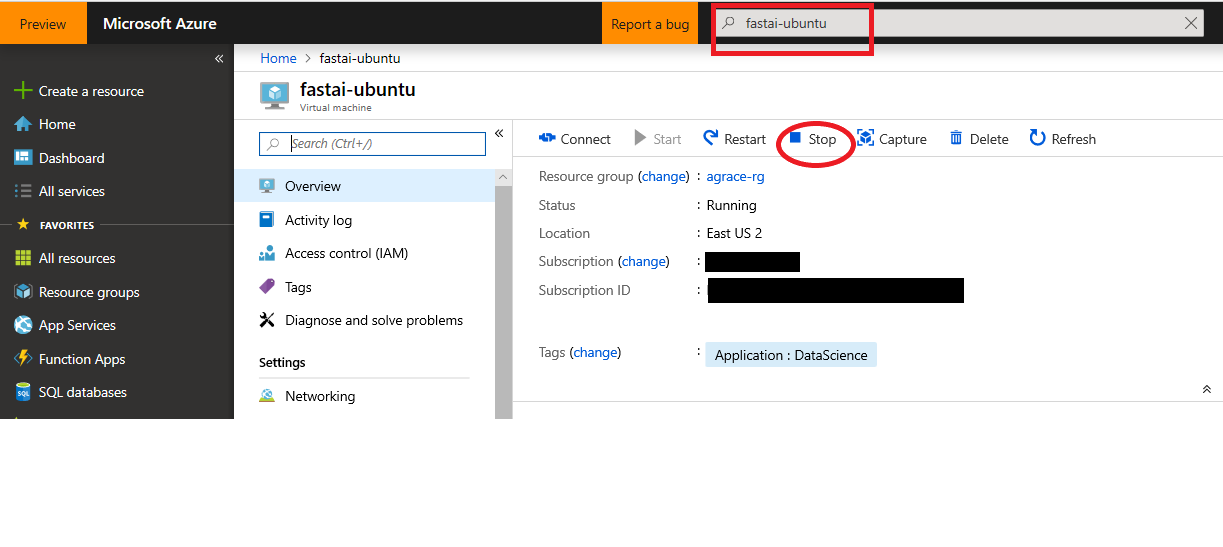
To access the DSVM created above and run the course notebooks, find the DSVM instance name on the Azure portal by typing the VM Name in the search box. You will see the DSVM detail page as below:
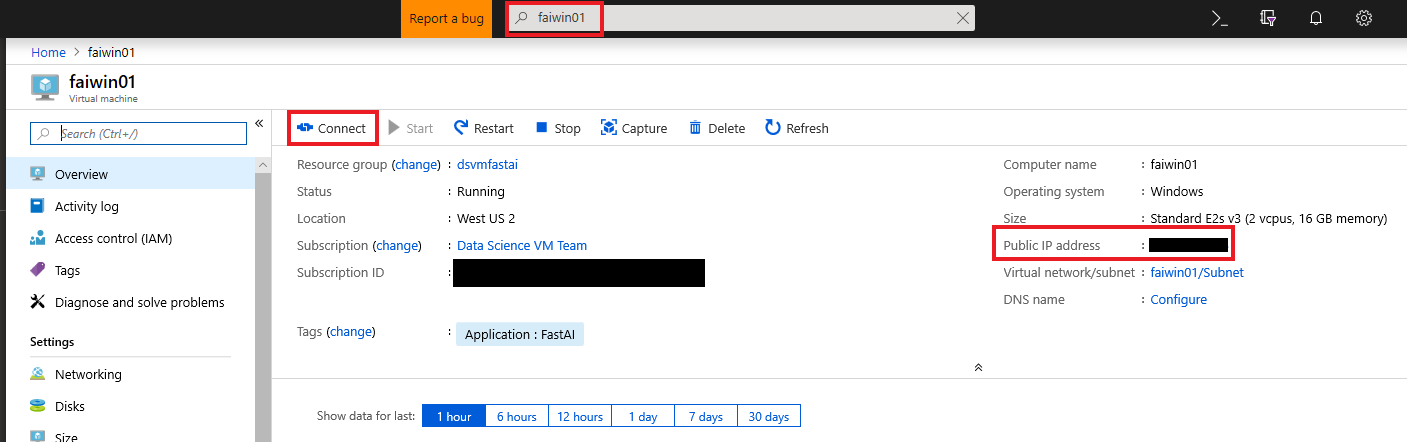
- For Linux,
- Copy the IP address from the page above.
- Enter the IP address in a browser as
https://<<ip address>>:8000to access Jupyter notebooks through the built-in Jupyterhub. Jupyter is supported on Chrome, Firefox or Safari. Note: You will see a certificate warning since the Jupyter server on the DSVM has a self signed certificate by default. You can skip through this certificate warning on your browser. - You will need to provide the usename and password you provided in the creation step.
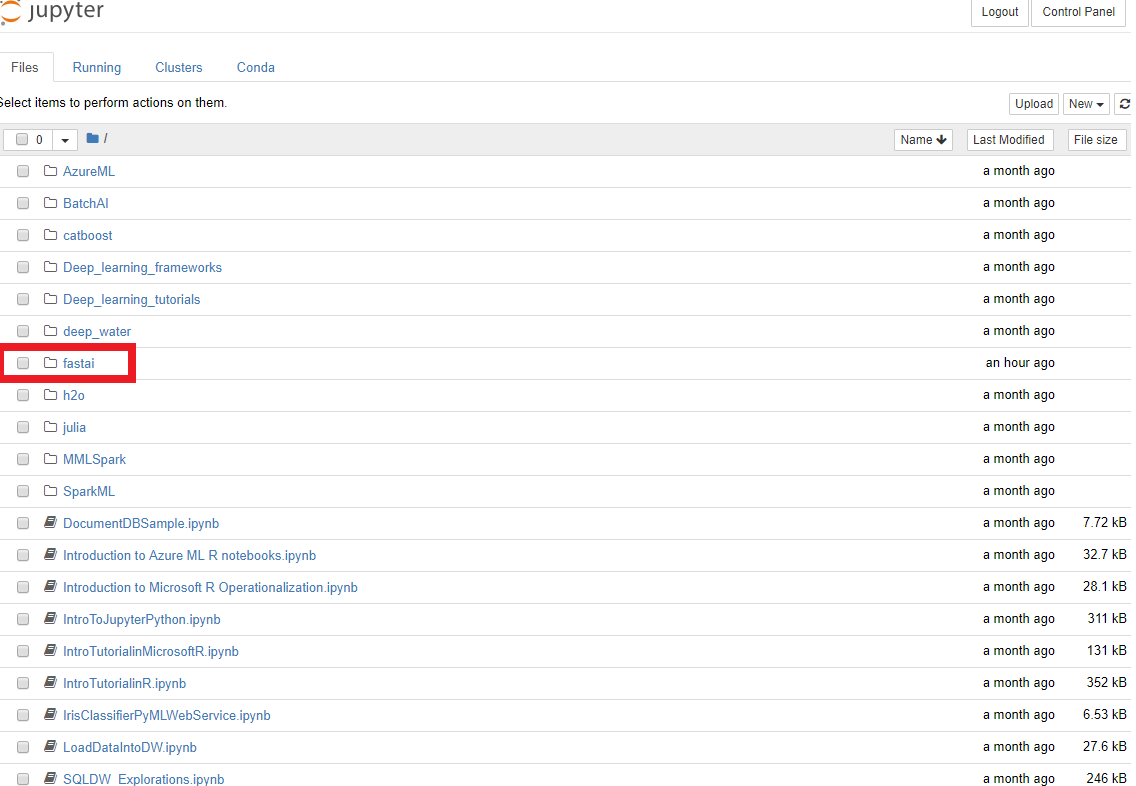
- To access the notebooks, navigate to fastai and then to course-v3 directory as shown below.
- If you don’t see the
/fastai/dir after connecting to Jupyterhub, please wait. The extension may still be installing.
- For Windows,
- Click the ‘Connect’ button on the DSVM page. This will open the Remote desktop (RDP) application.
- Enter the username and password you provided in the creation step.
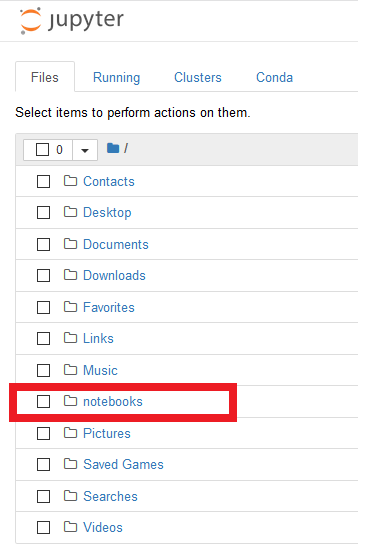
- Click on the Jupyter icon on the taskbar and then click on notebooks and then navigate to fastai\course-v3 directory in Jupyter.
NOTE: If you created a pre-emptable instance, it will appear on Azure portal as a “Virtual machine scale set” instead of a “Virtual Machine”. This is expected. You can still find the IP address of these instance on the Portal and access Jupyter similar to the Linux case above.
Stop an instance
When you are done, you can stop the instance by searching for the DSVM name on Azure portal and then clicking on the “Stop” button. You will be charged if you dont stop an instance.
Azure can also stop your VM on a schedule - useful as a backstop in case you forget to stop. Start/Stop VMs during off-hours solution in Azure Automation The mobile client for Azure can also be useful for starting your VM so it is ready to go when you reach your home/office.
References
Many thanks to Amanda Rapsang, Gopi Kumar, Daniel Schneider and Gregory Buehrer for writing the initial version of this guide.