Welcome to AWS EC2
AWS EC2 provides preconfigured machine images called DLAMI, which are servers hosted by Amazon that are specially dedicated to Deep Learning tasks. Setting up an AWS EC2 instance, even with DLAMI, can be daunting. But don’t worry, we got you covered. In fact, Amazon has a sweet step by step guide to set it up and we are going to draw heavily from their tutorial.
If you are returning to work and have previously completed the steps below, please go to the returning to work section.
Pricing
A p2.xlarge instance in Amazon which is what we suggest, is $0.9 an hour.
Step 1: Sign in or sign up
Visit the AWS webpage and click on ‘Sign In to the Console’.

If you do not have an account, the button to press will say ‘Sign up’ instead of ‘Sign in to the Console’.

Next, enter your credentials if you are signing in or e-mail, account name and password if you need to sign up. If you are signing up you will also need to set your credit card details. This will be the credit card to which all the charges of the instance usage will be applied (if you have free credits you will not be charged until they are over). Note that you will also need to provide a phone number that will be called to verify your identity.
Step 2: Request service limit
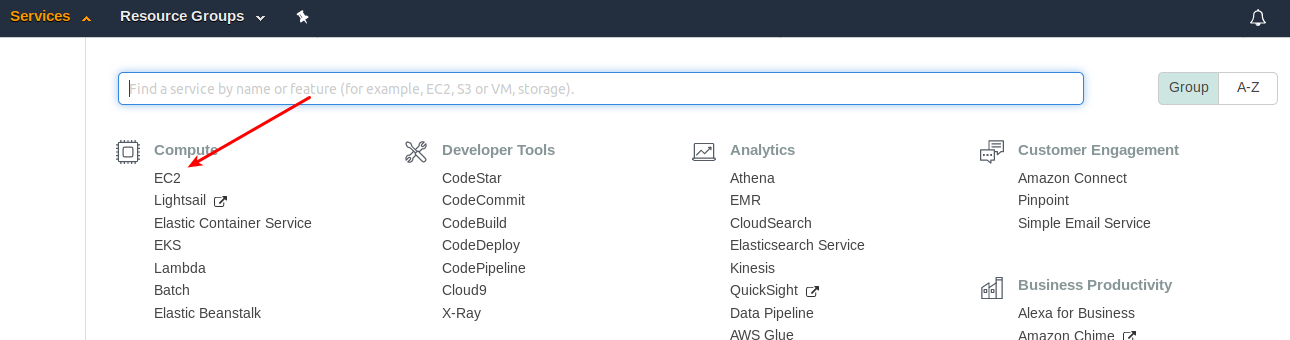
If you just created your account, you’ll need to ask for an increase limit in the instance type we need for the course (default is 0). First click on ‘Services’ and then ‘EC2’.
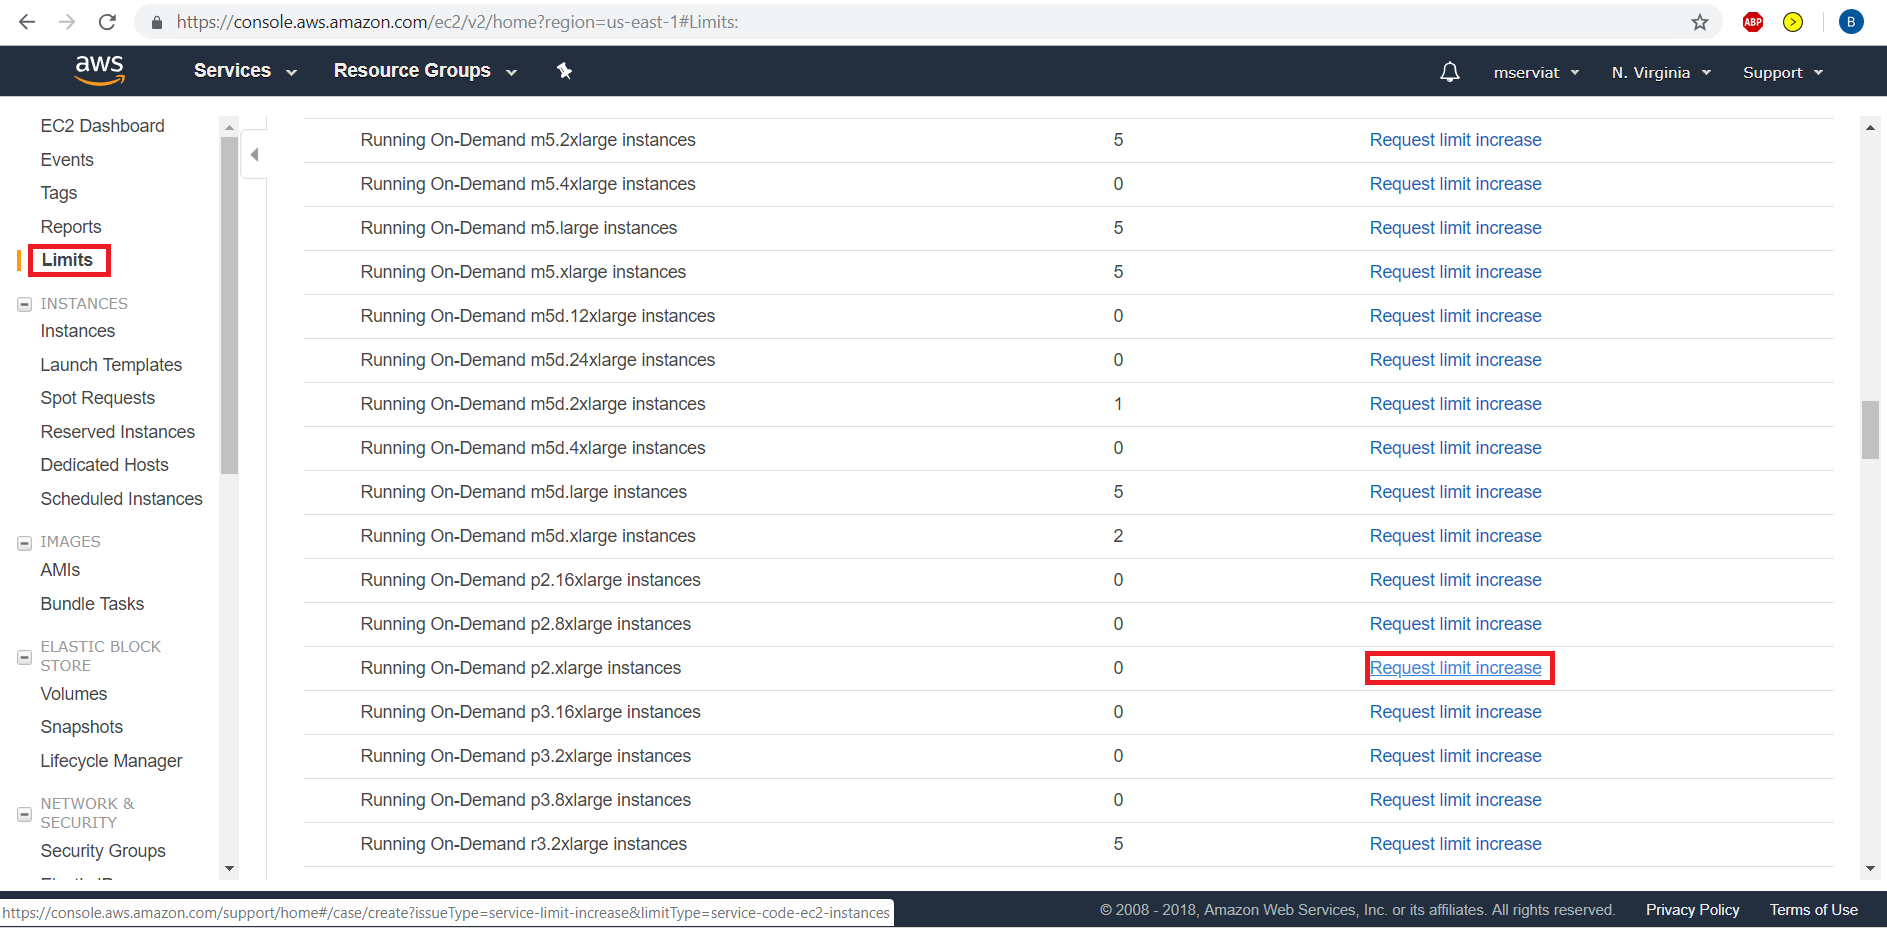
Then on the left bar, choose Limits, then scroll through the list until you find p2.xlarge. You can skip this step if your limit is already 1 or more, otherwise click on ‘Request limit increase’.
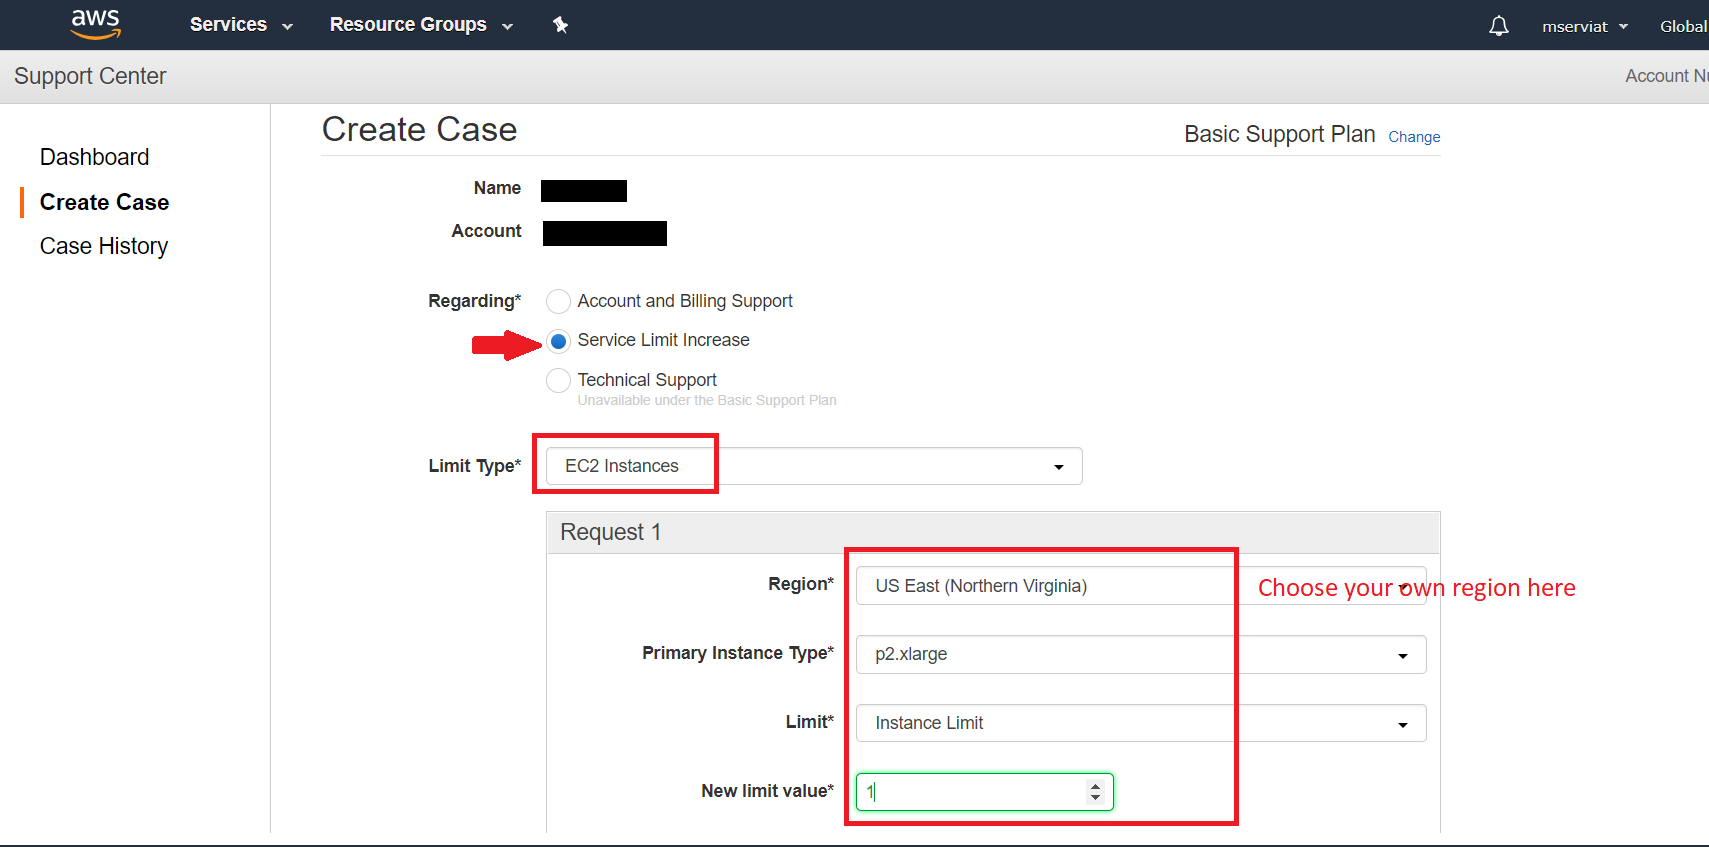
Fill the form like below, by selecting ‘Service Limit Increase’, choose ‘EC2 instance’, your region, then ‘p2.xlarge’ and ask for a new limit of 1.
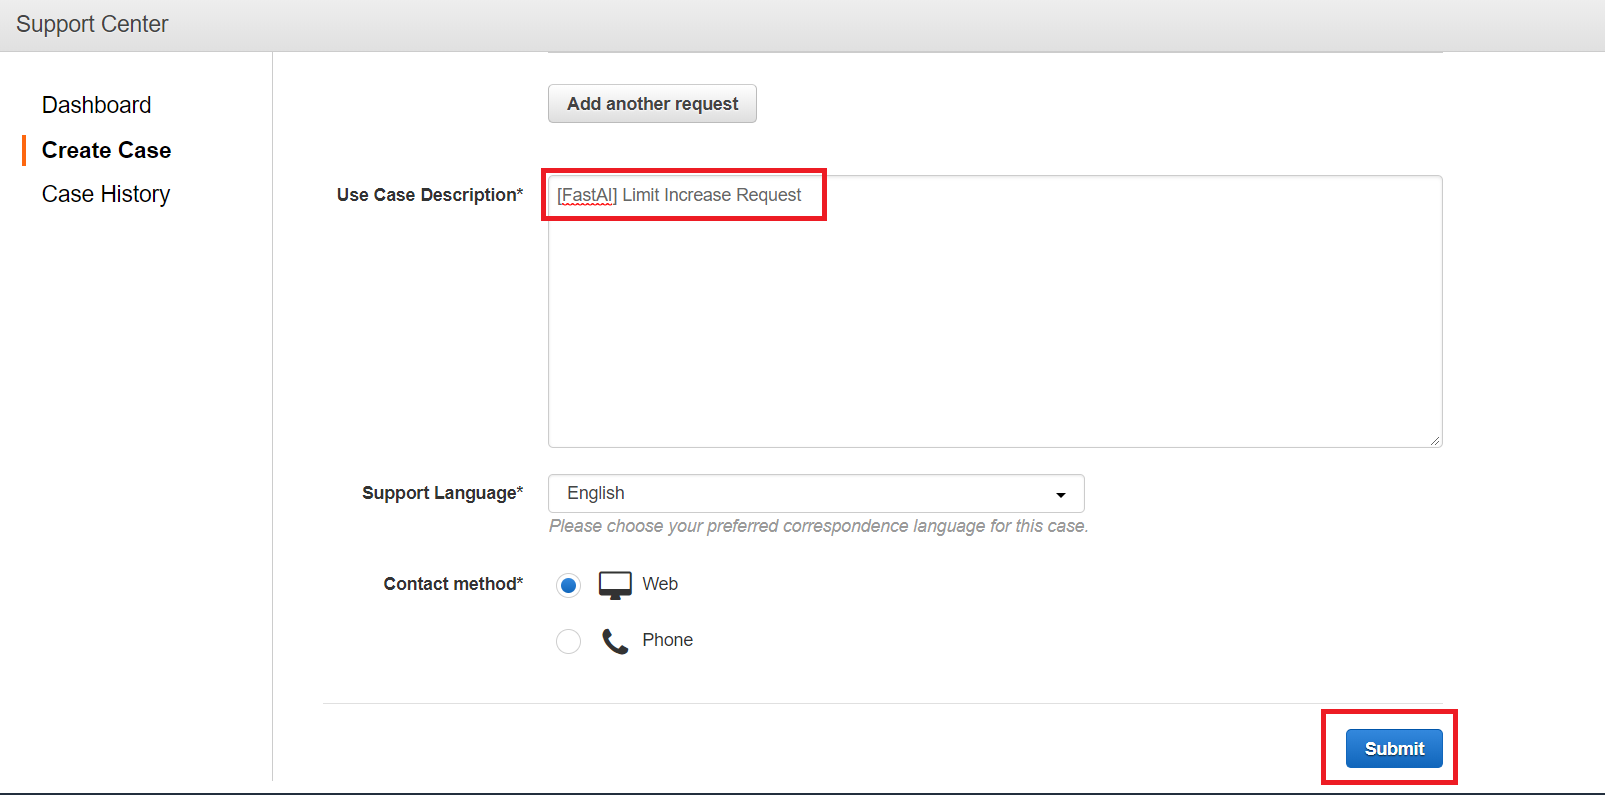
Type the message ‘[FastAI] Limit Increase Request’ in the use case description box, then select your preferred language and contact method before clicking ‘Submit’. You should have an automatic reply telling you they’ll look in your case, then an approval notice (hopefully in just a couple of hours).
While you wait, get on the third step.
Step 3: Create an ssh key and upload it to AWS
For this step, you’ll need a terminal. This requires an extra installation on Windows which is all described in this separate tutorial.
Once in your terminal, type ‘ssh-keygen’ then press return three times. This will create a directory named .ssh/ with two files in it, ‘id_rsa’ and ‘id_rsa.pub’. The first one is your private key and you should keep it safe, the second one is your public key, that you will transmit to people you want to securely communicate with (in our case AWS).
On Windows, you will need to copy this public key in a Windows directory to easily access it (since it’s created in the WSL home folder). The following line will copy it in ‘C:\Temp’, feel free to replace Temp with any directory you prefer.
cp .ssh/id_rsa.pub /mnt/c/Temp/
Once you have made your ssh key, go back to the AWS console and make sure you are in the region in which you have requested your service limit increase. You can tell where you are by looking at the web address of your console. For example https://us-west-2.console.aws.amazon.com/ is the Oregon region While: https://ap-south-1.console.aws.amazon.com/ is the Mumbai region You can change your region by choosing from the dropdown list to the right of your username in the top right corner of your screen.
Again, click on ‘Services’ and then ‘EC2’.
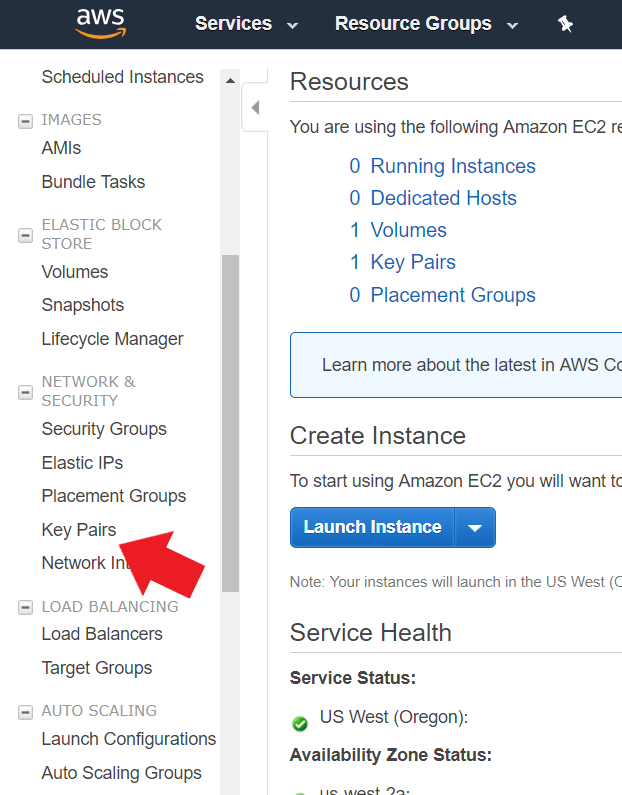
You can also search for EC2 in the querry bar. Scroll in the left menu until you find ‘Key pairs’ then click on it.
On the new screen:
- Click on the ‘Import Key Pair’ button
- Browse to select the file id_rsa.pub from where you put it (either the ‘.ssh’ folder of your home directory or the folder to where you copied it)
- Customize the name of the key if you want, then click ‘Import’

Step 4: Launch an instance
Note that this step will fail at the end if you didn’t get the approval for p2 instances, so you may have to wait a bit before starting it.
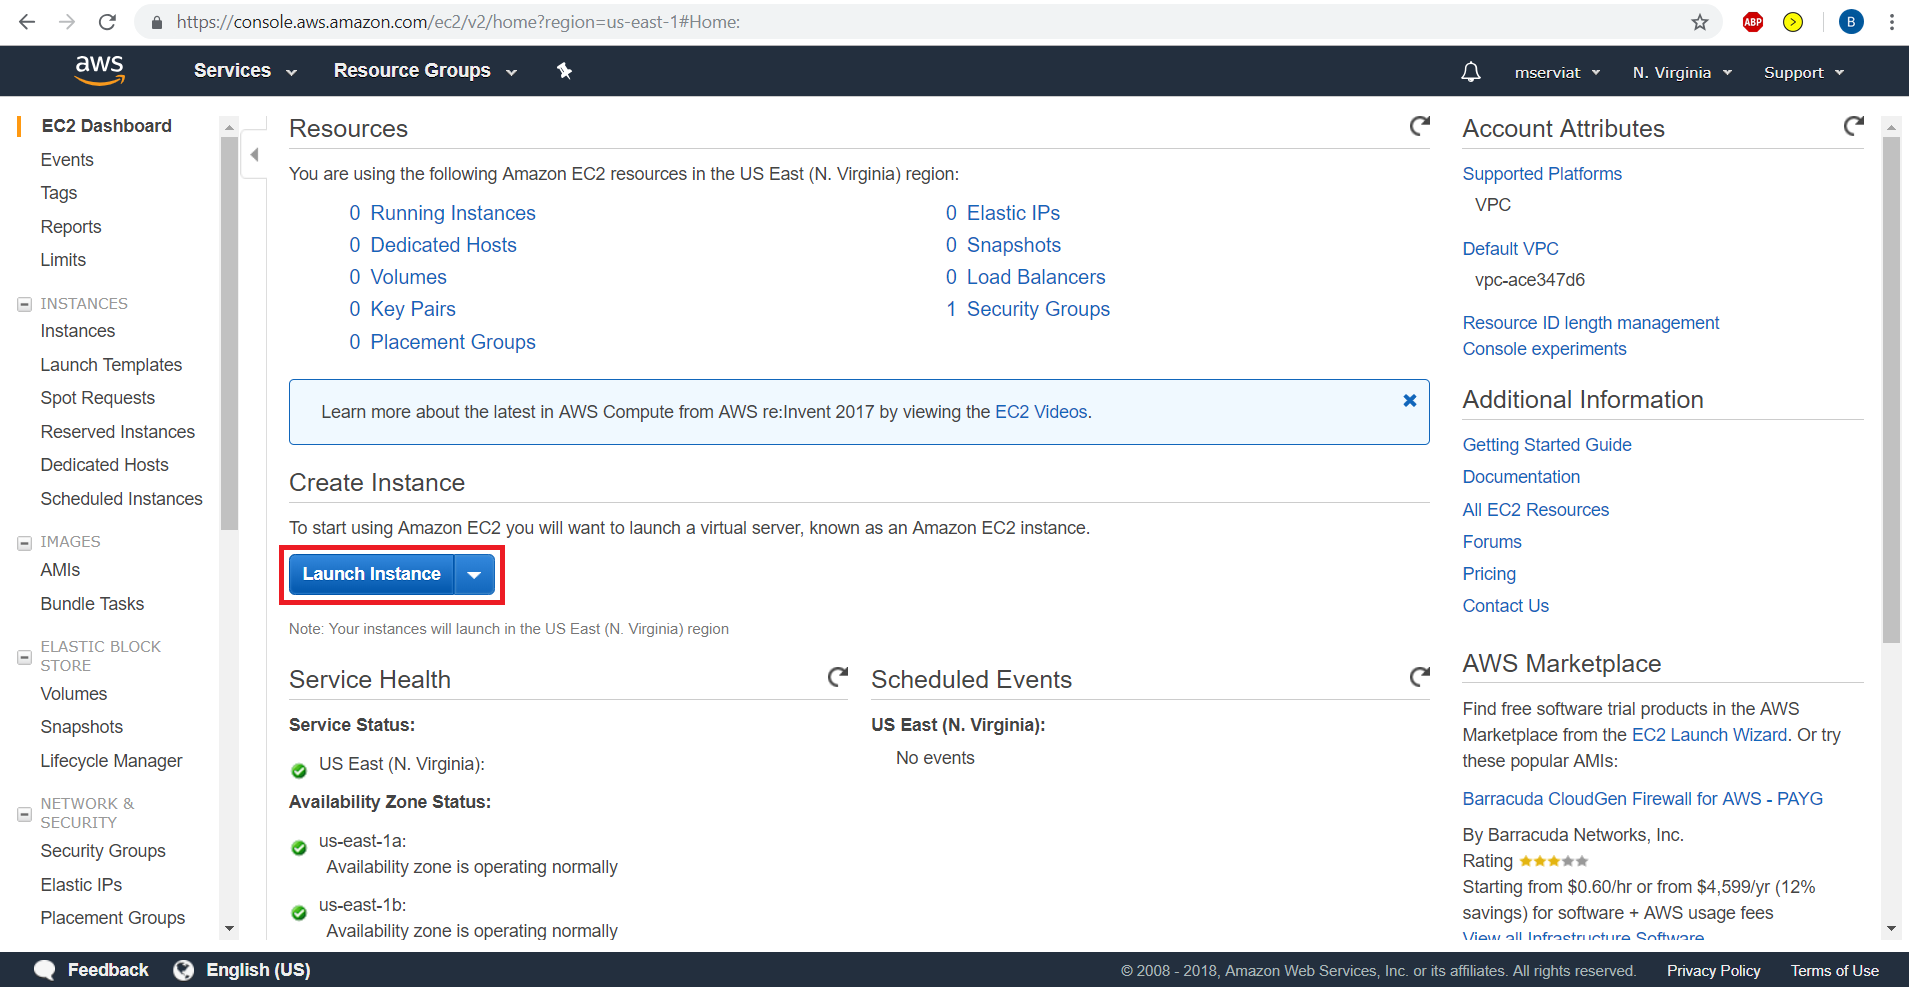
Log in to the AWS console then search for EC2 in the query bar or click ‘EC2’ in the services. Once on the EC2 screen, click launch instance.
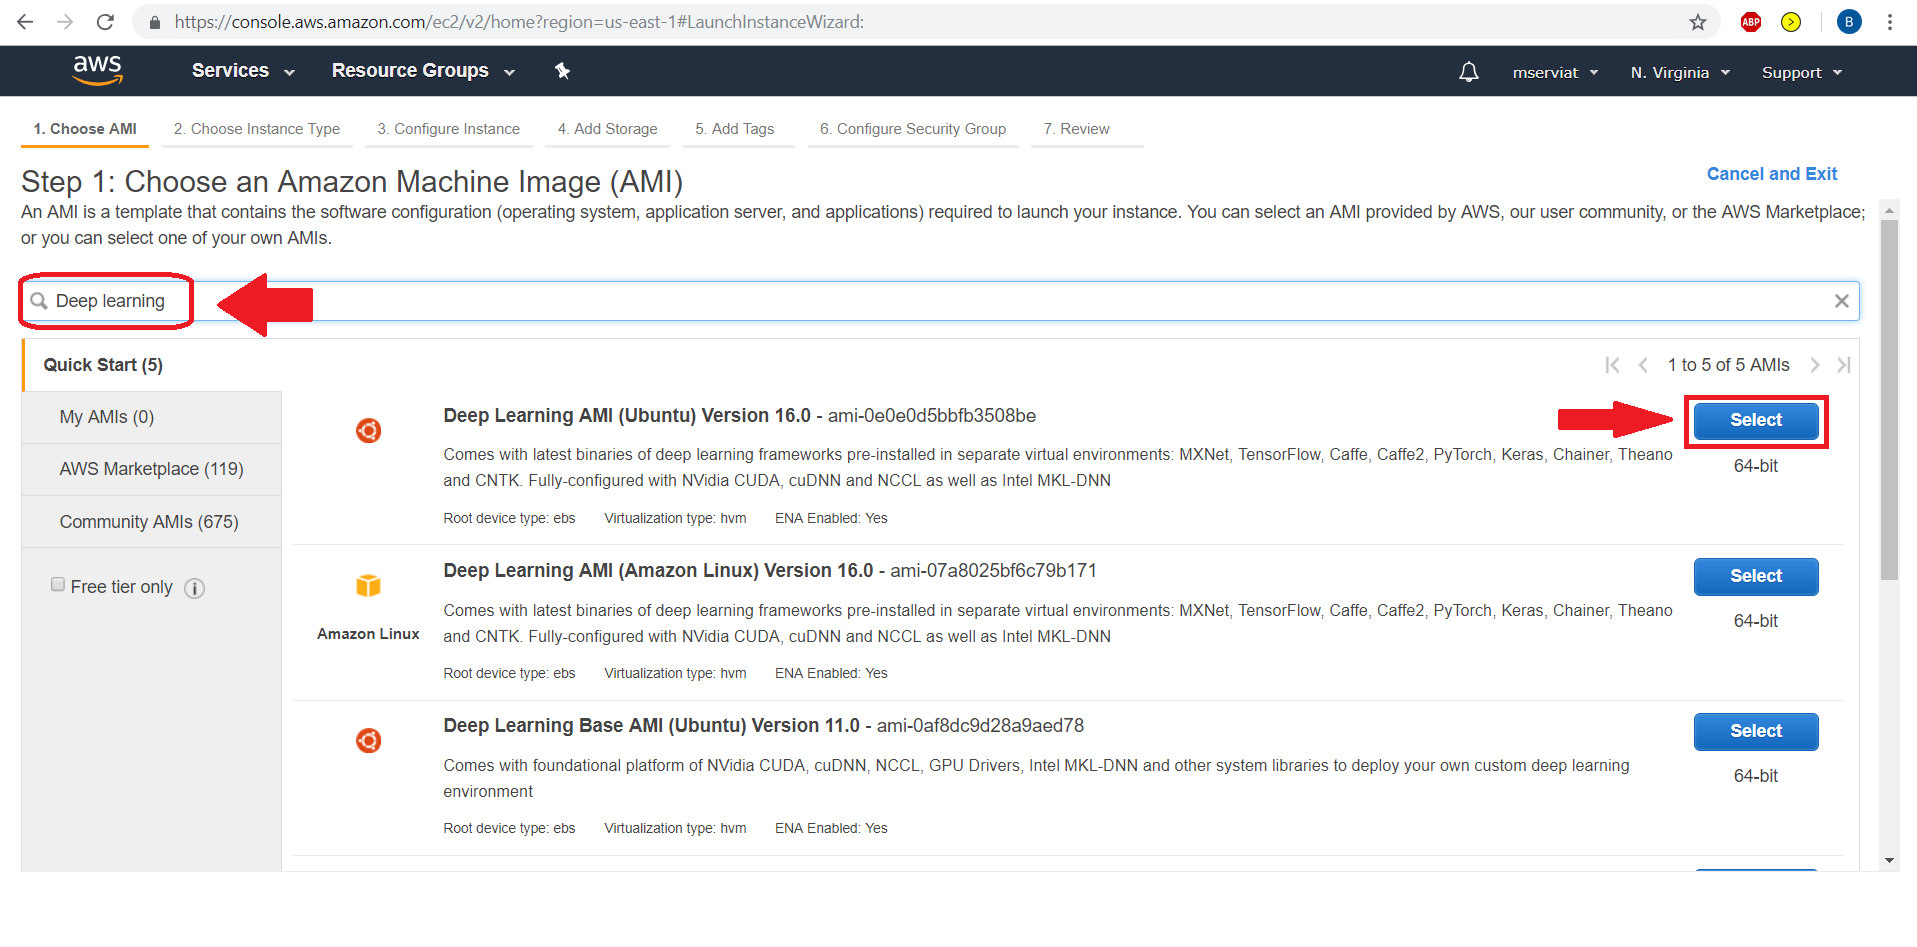
Search for ‘deep learning’ and select the first option: Deep Learning AMI (Ubuntu) Version 24.1
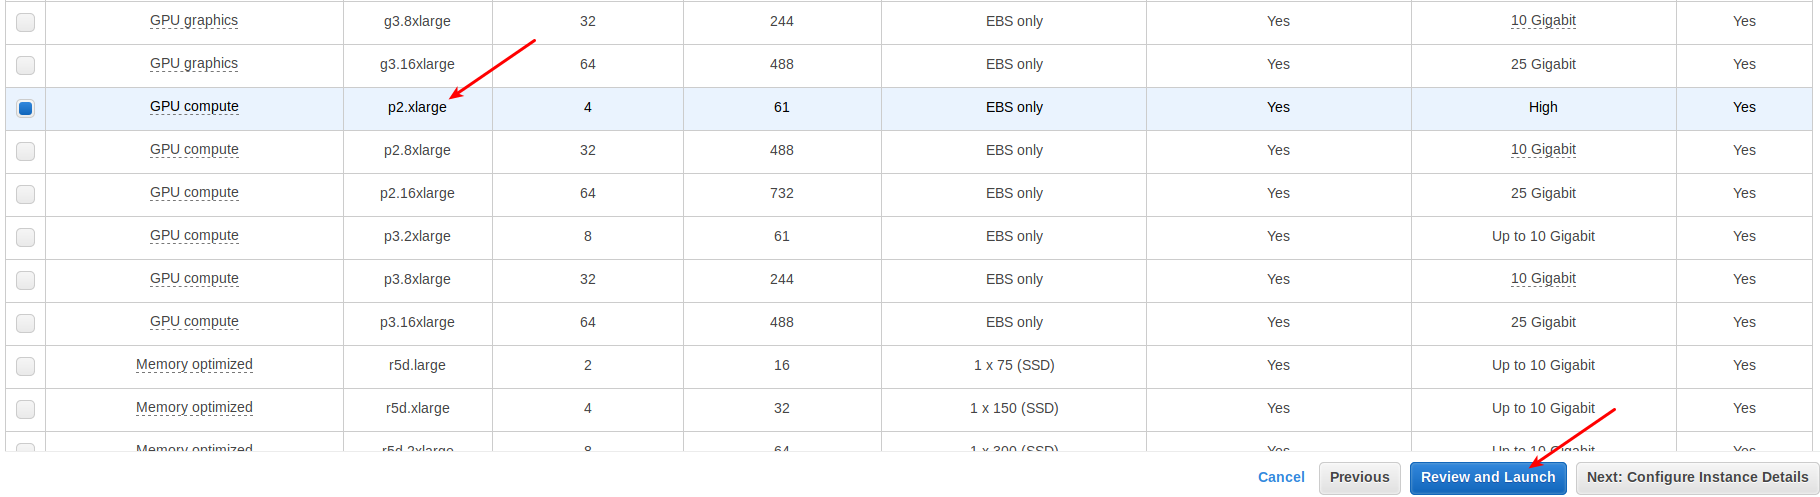
Scroll down until you find ‘p2.xlarge’ and select it. Then press ‘Review and Launch’.
Finally, when in the ‘Review’ tab press ‘Launch’.

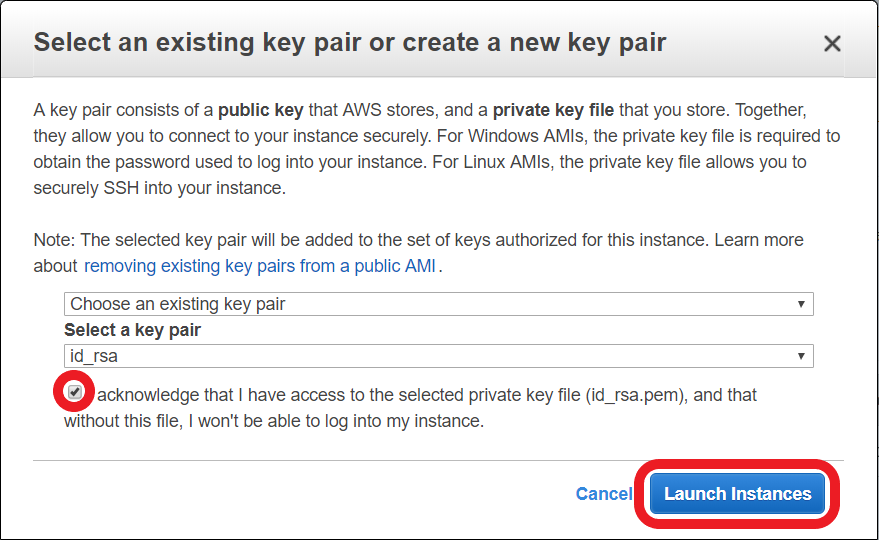
In the pop-up window’s first drop-down menu, select the key you created in step 2 then tick the box to acknowledge you have access to the selected private key file then click on ‘Launch Instance’
Step 5: Connect to your instance
In the next window scroll down then click on ‘View Instances’. You will see that you have an instance that says ‘running’ under ‘Instance State’. Amazon charges you by the amount of seconds an instance has been running so you should always stop an instance when you finish using it to avoid getting extra charges. More on this, on Step 7.
You will have to wait a little bit for your instance to be ready while the light under instance state is orange.

When it turns green, copy your instance IP in the IPv4 column.

It’s time to connect! Open your command line terminal and type the following command:
ssh -i ~/.ssh/<your_private_key_pair> -L localhost:8888:localhost:8888 ubuntu@<your instance IP>
(Replace ‘<your instance IP>’ with your the IP address of your instance as shown before. Also note that you want to use ‘<your_private_key_pair>’, not ‘<your_private_key_pair.pub>’.)
You may have a question about trusting this address, to which you should reply ‘yes’.
Step 6: Access fast.ai materials
Run
git clone https://github.com/fastai/course-v3
in your terminal to get a folder with all the fast.ai materials.
Then run these commands to install the necessary packages for experimenting with fast.ai and PyTorch:
conda update conda
conda install -c pytorch -c fastai fastai pytorch
Next move into the directory where you will find the materials for the course by running:
cd course-v3/nbs/dl1
Finally run
jupyter notebook
in your terminal, and you can access the notebook at localhost:8888.
If going to localhost:8888 doesn’t work, or asks for a password/token return to your terminal window and look for this message after you typed ‘jupyter notebook’: “Copy/paste this URL into your browser when you connect for the first time, to login with a token:”
Copy and paste that URL into your browser, and this should connect you to your jupyter notebook.
Go back to the first page to see how to use this jupyter notebook and run the jupyter notebook tutorial. Come back here once you’re finished and don’t forget to stop your instance with the next step.
If you have any problem while using the fastai library try running
conda install -c fastai fastai
Step 7: Stop your instance when you are done
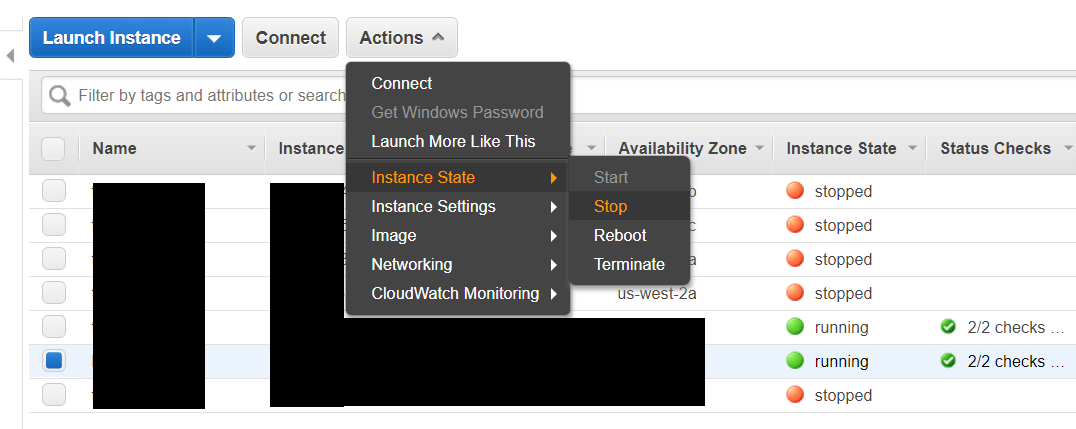
When you finish working you must go back to your AWS console and stop your instance manually to avoid getting extra charges. A good practice is setting a reminder for yourself (when you close your computer or log off) so you never forget to do it!
To see how to open it again, update the course or the fastai library, go to the Returning to work page.
Note that you should press Stop, not Terminate. If you press Terminate it will remove your instance entirely and you will lose your work.
References
https://aws.amazon.com/getting-started/tutorials/get-started-dlami/
Many thanks to Francisco Ingham for writing the initial version of this guide.