To return to your notebook, the basic steps will be:
- Start your instance
- Update the course repo
- Update the fastai library
- When done, shut down your instance
Step by step guide
Start your instance
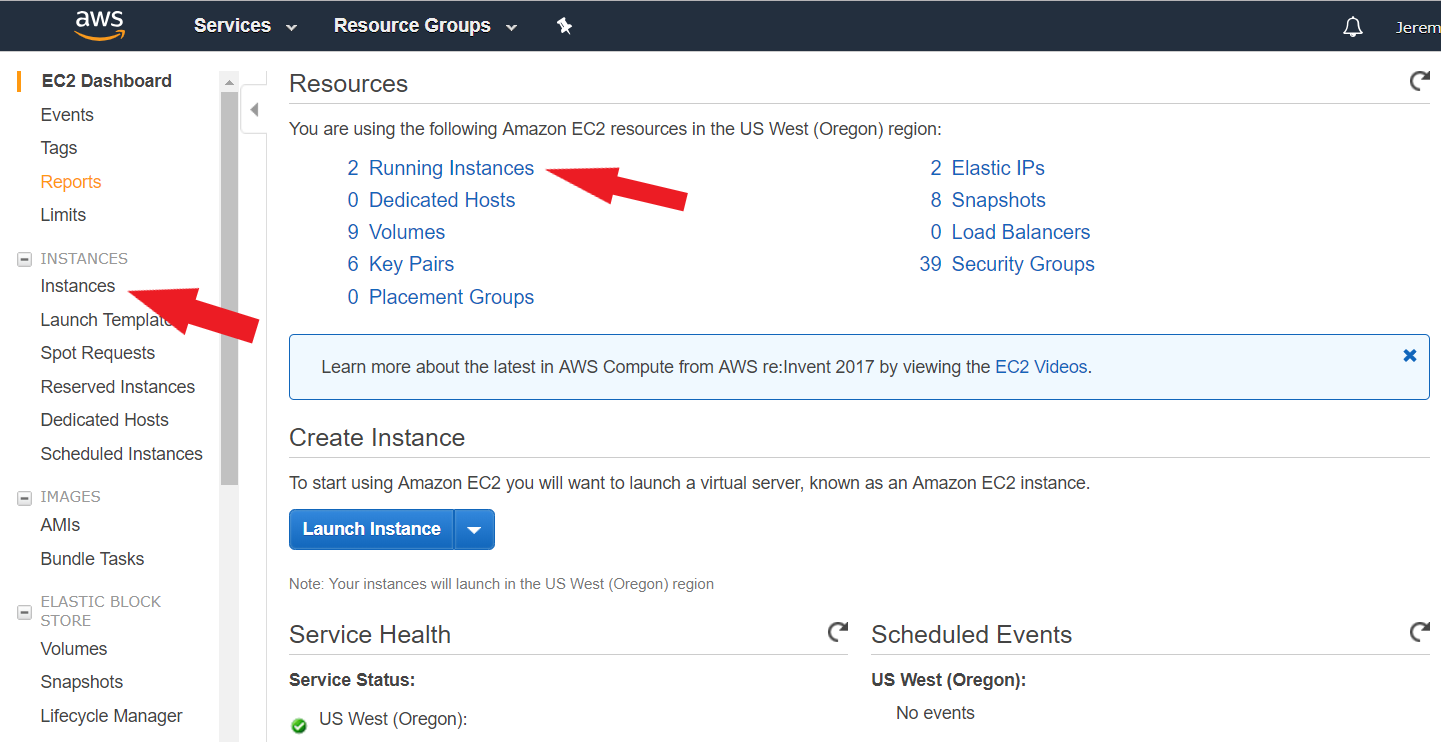
Log in to the AWS console then click on the EC2 link (it should be in your history, otherwise find it in the ‘Services’ on the left or type EC2 in the search bar). Once on this page, either click on ‘Instances’ in the left menu or on the ‘Running Instances’ link.
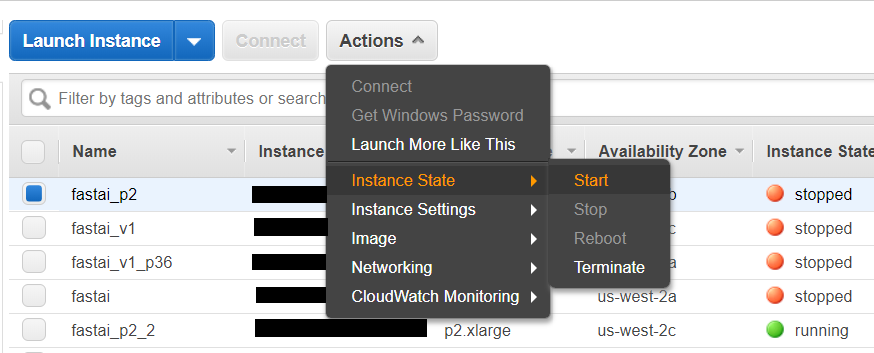
Tick the box of the instance you want to start, then click on ‘Actions’, scroll to ‘Instance state’ then click on ‘Start’.
Note that in the ‘Instance Settings’ you can change your ‘Instance Type’ while the instance is stopped. This can be extremely useful when you want to start on a lower-end machine type, test everything is okay, then move to a more powerful GPU.
You will have to wait a little bit for your instance to be ready while the light under instance state is orange.

When it turns green, copy your instance IP in the IPv4 column.

Open your terminal and use the command below (with IP_ADDRESS replaced by the ip address of your instance)
ssh -L8888:localhost:8888 ubuntu@IP_ADDRESS
If you want to update the course repository or the library (see below) you should do so now, and once you’re ready type
jupyter notebook
You can then access your notebooks at localhost:8888.
Update the course repo
To update the course repo, while you’re in the terminal, run those two instructions:
cd course-v3
git pull

This should give you the latest of the course notebooks. If you modified some of the notebooks in course-v3/nbs directly, GitHub will probably throw you an error. You should type git stash to remove your local changes. Remember you should always work on a copy of the lesson notebooks.
Update the fastai library
To update the fastai library, while you’re in the terminal type
conda update conda
conda install -c fastai fastai
Stop your instance
When you finish working you must go back to your AWS console and stop your instance manually to avoid getting extra charges. A good practice is setting a reminder for yourself (when you close your computer or log off) so you never forget to do it!
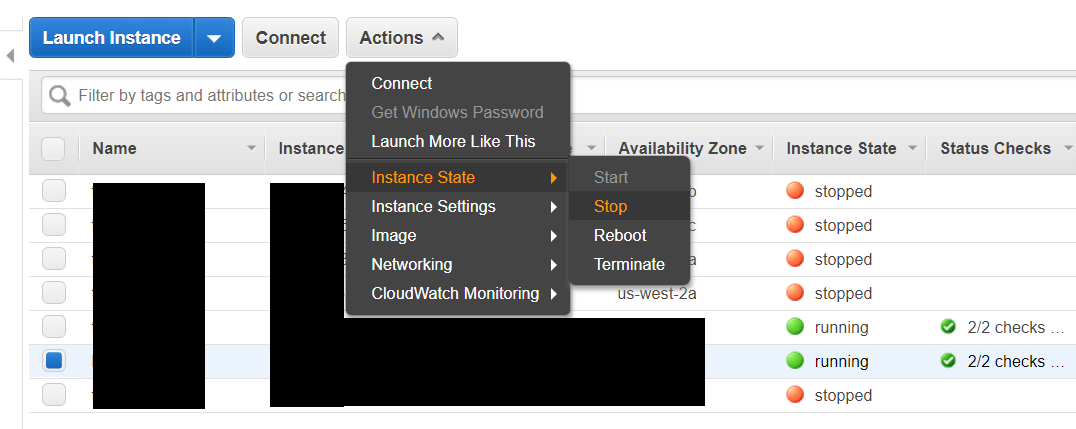
Once in your EC2 console, click ‘Instances’ on the left menu then tick the box near your instance. Click on ‘Actions’, scroll down to ‘Instance State’ then choose ‘Stop’.
NOTE: you will be charged for the time that your instance is running.