AWS Elastic Beanstalk Deployment
This is a quick guide to deploy your trained models using AWS Elastic Beanstalk. This guide comes with a starter app deploying Jeremy’s Bear Image Classification model form Lesson 2.
Grab AWS Elastic Beanstalk starter pack for model deployment
wget https://github.com/fastai/course-v3/raw/master/docs/production/aws-beanstalk.zip

unzip aws-beanstalk.zip

cd app
Per-project setup
Upload your trained model file
Upload your trained model file (for example stage-2.pth) to a cloud service like Google Drive or Dropbox. Copy the download link for the file. Note: the download link is the one which starts the file download directly and is normally different than the share link which presents you with a view to download the file (use https://rawdownload.now.sh/ if needed)
If you want to just test the deployment initially, you can use Jeremy’s bear classification model from Lesson 2, you can skip this step since that model’s weights URL is already filled in the sample app.
Customize the app for your model
Open up the file server.py inside the app directory and update the model_file_url variable with the download URL copied above In the same file, update the line
classes = ['black', 'grizzly', 'teddys']
with the classes you are expecting from your model.
Deploy
To begin, Open AWS Elastic Beanstalk Console, Click Create New Application and then add details for your demo application name & description and click “create”. You will be presented with new screen for creating new environment
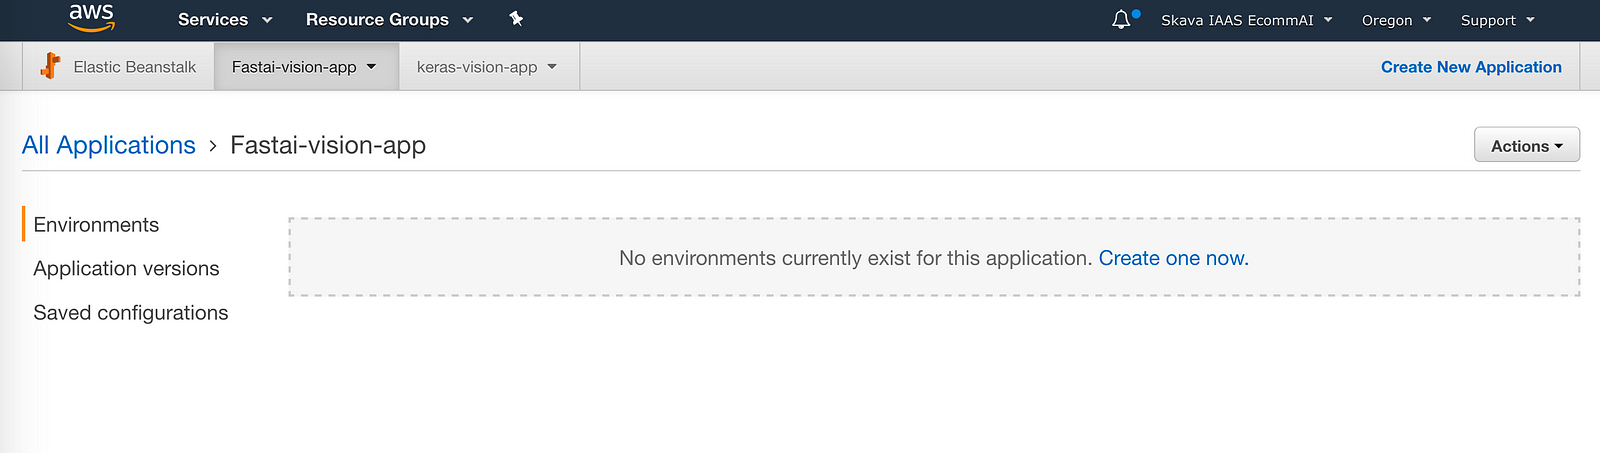
Choose Create one now and then you will be presented with below screen. .
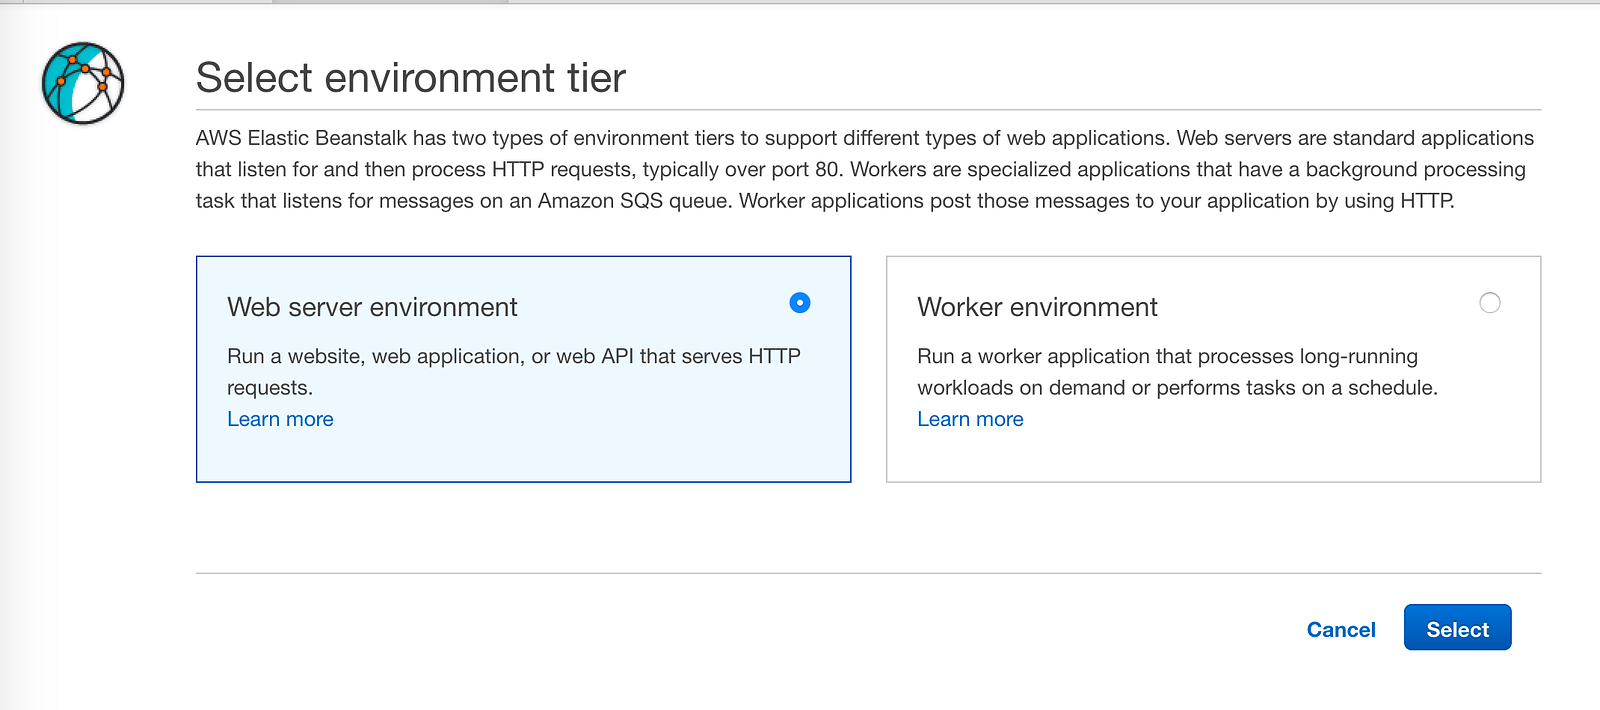
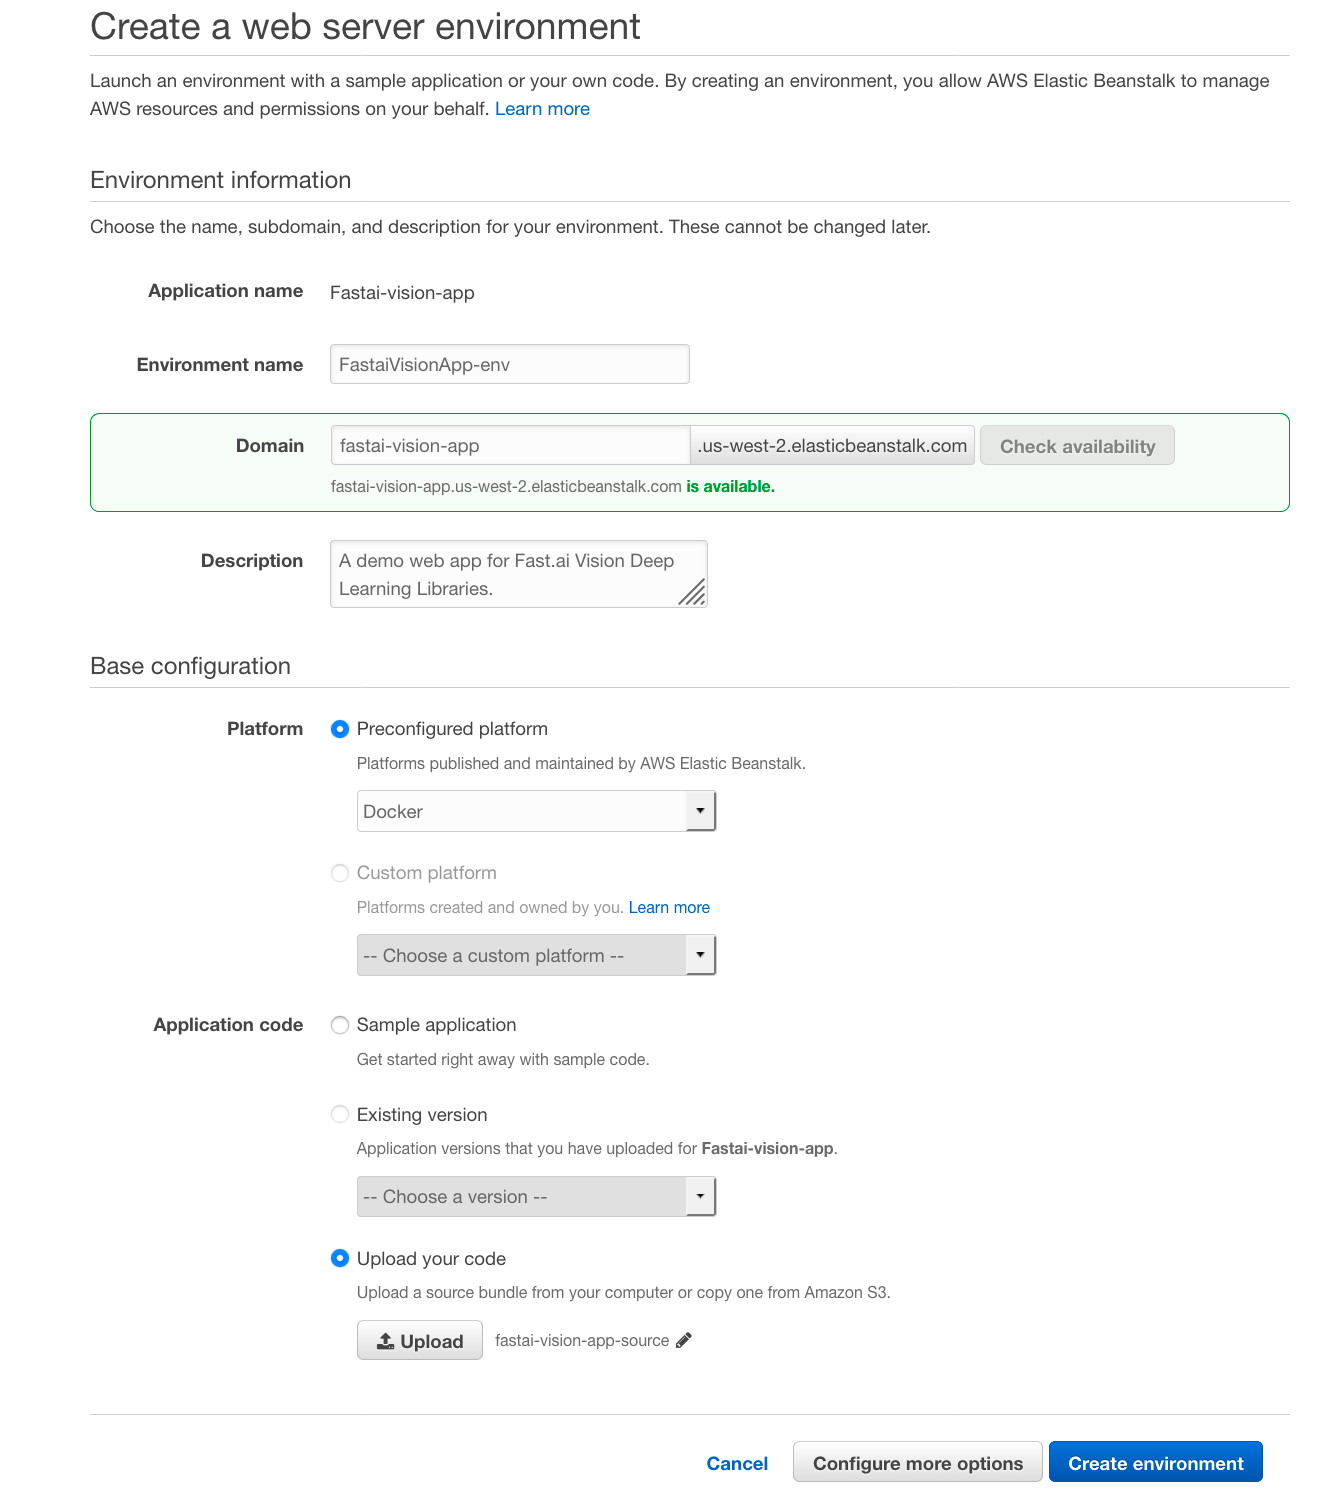
Select Web Server Environment” here and you will be presented with create web server environment details screen.
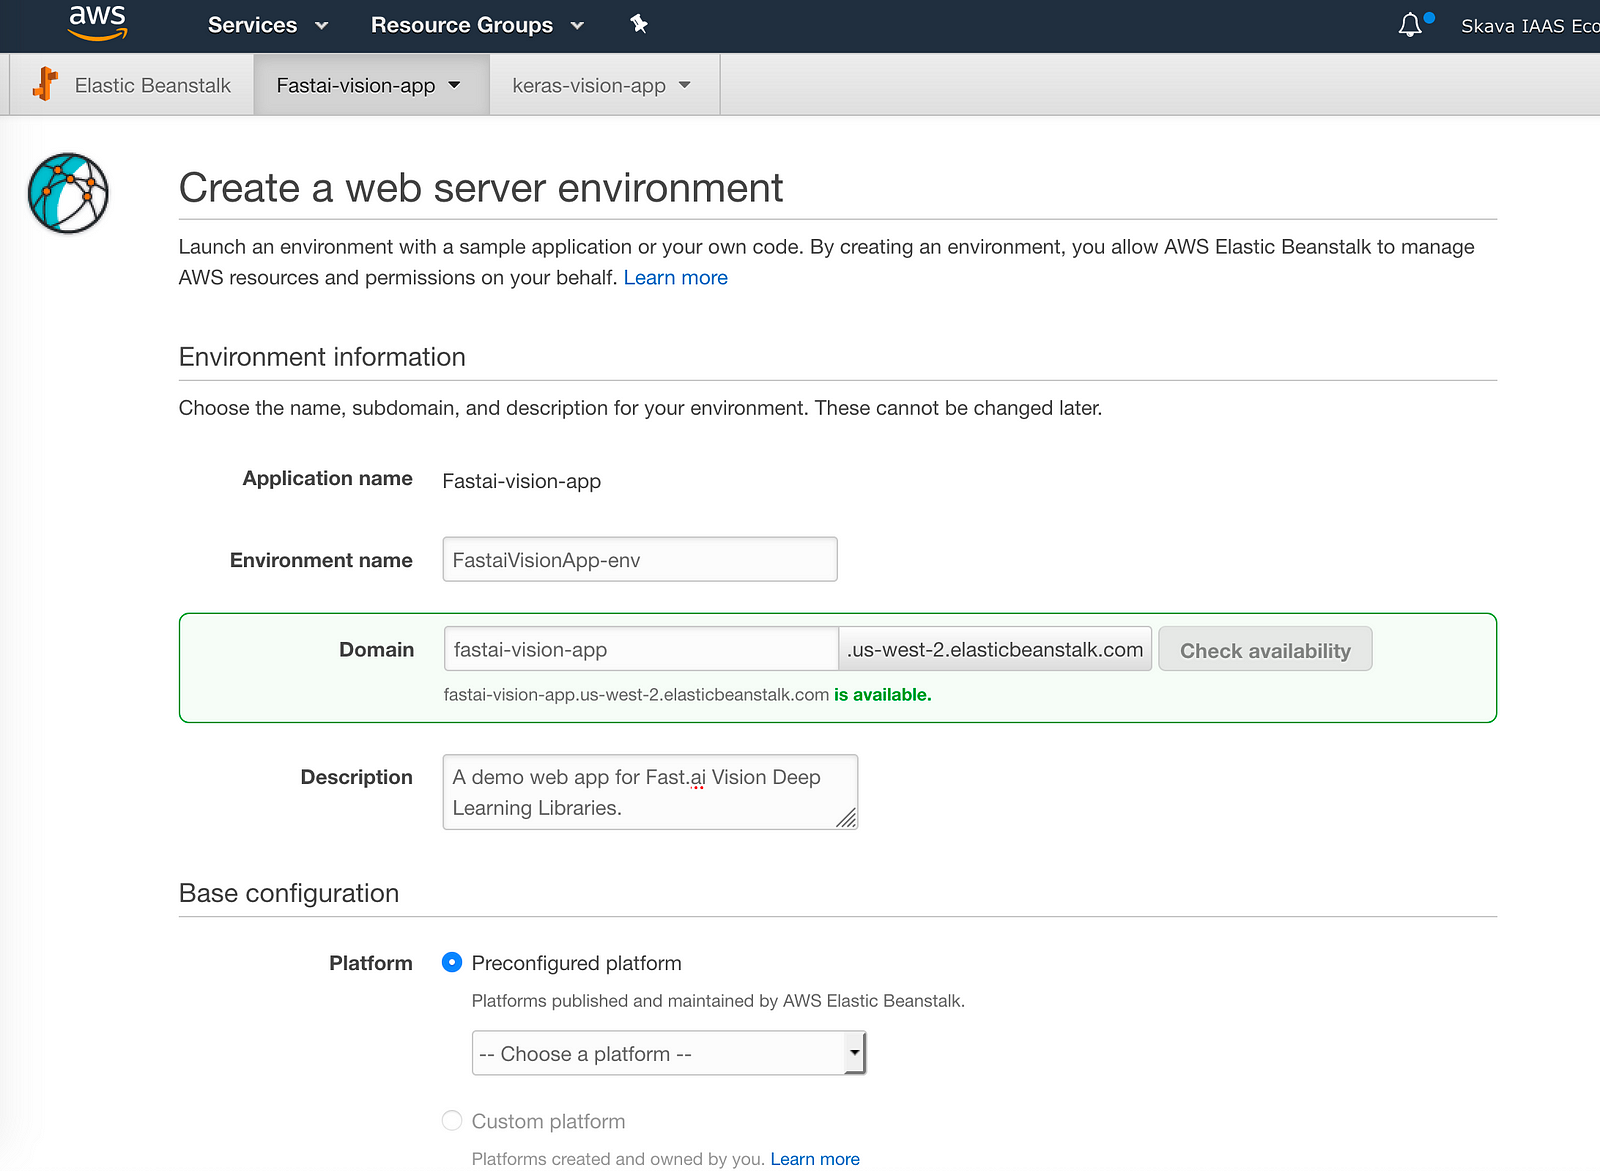
Add your Environment name, Choose your Domain name, see if it’s available, and then add Description,
IMPORTANT: Under Base configuration Section, Choose Preconfigured Platform and then choose “Docker” generic option.
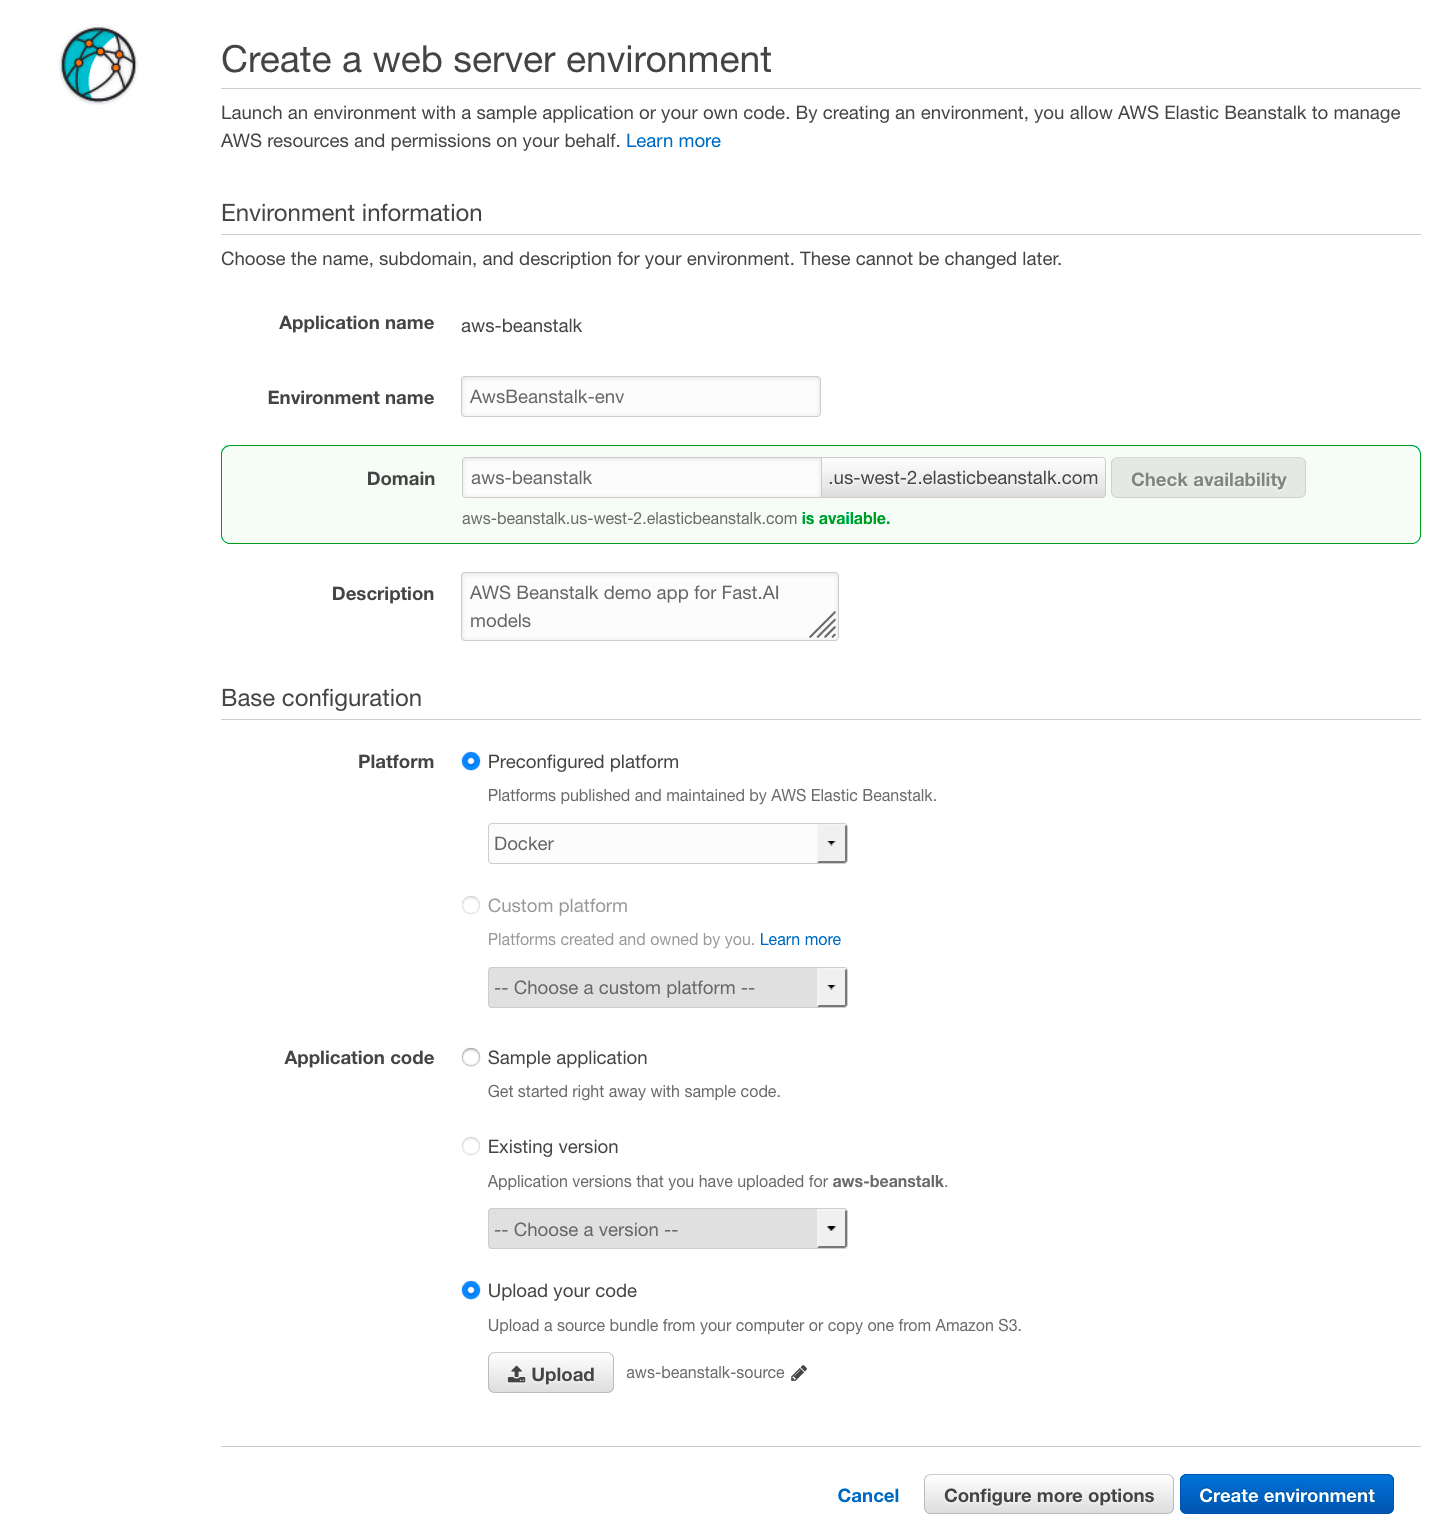
Scroll down below on same page since, you need to add more details.
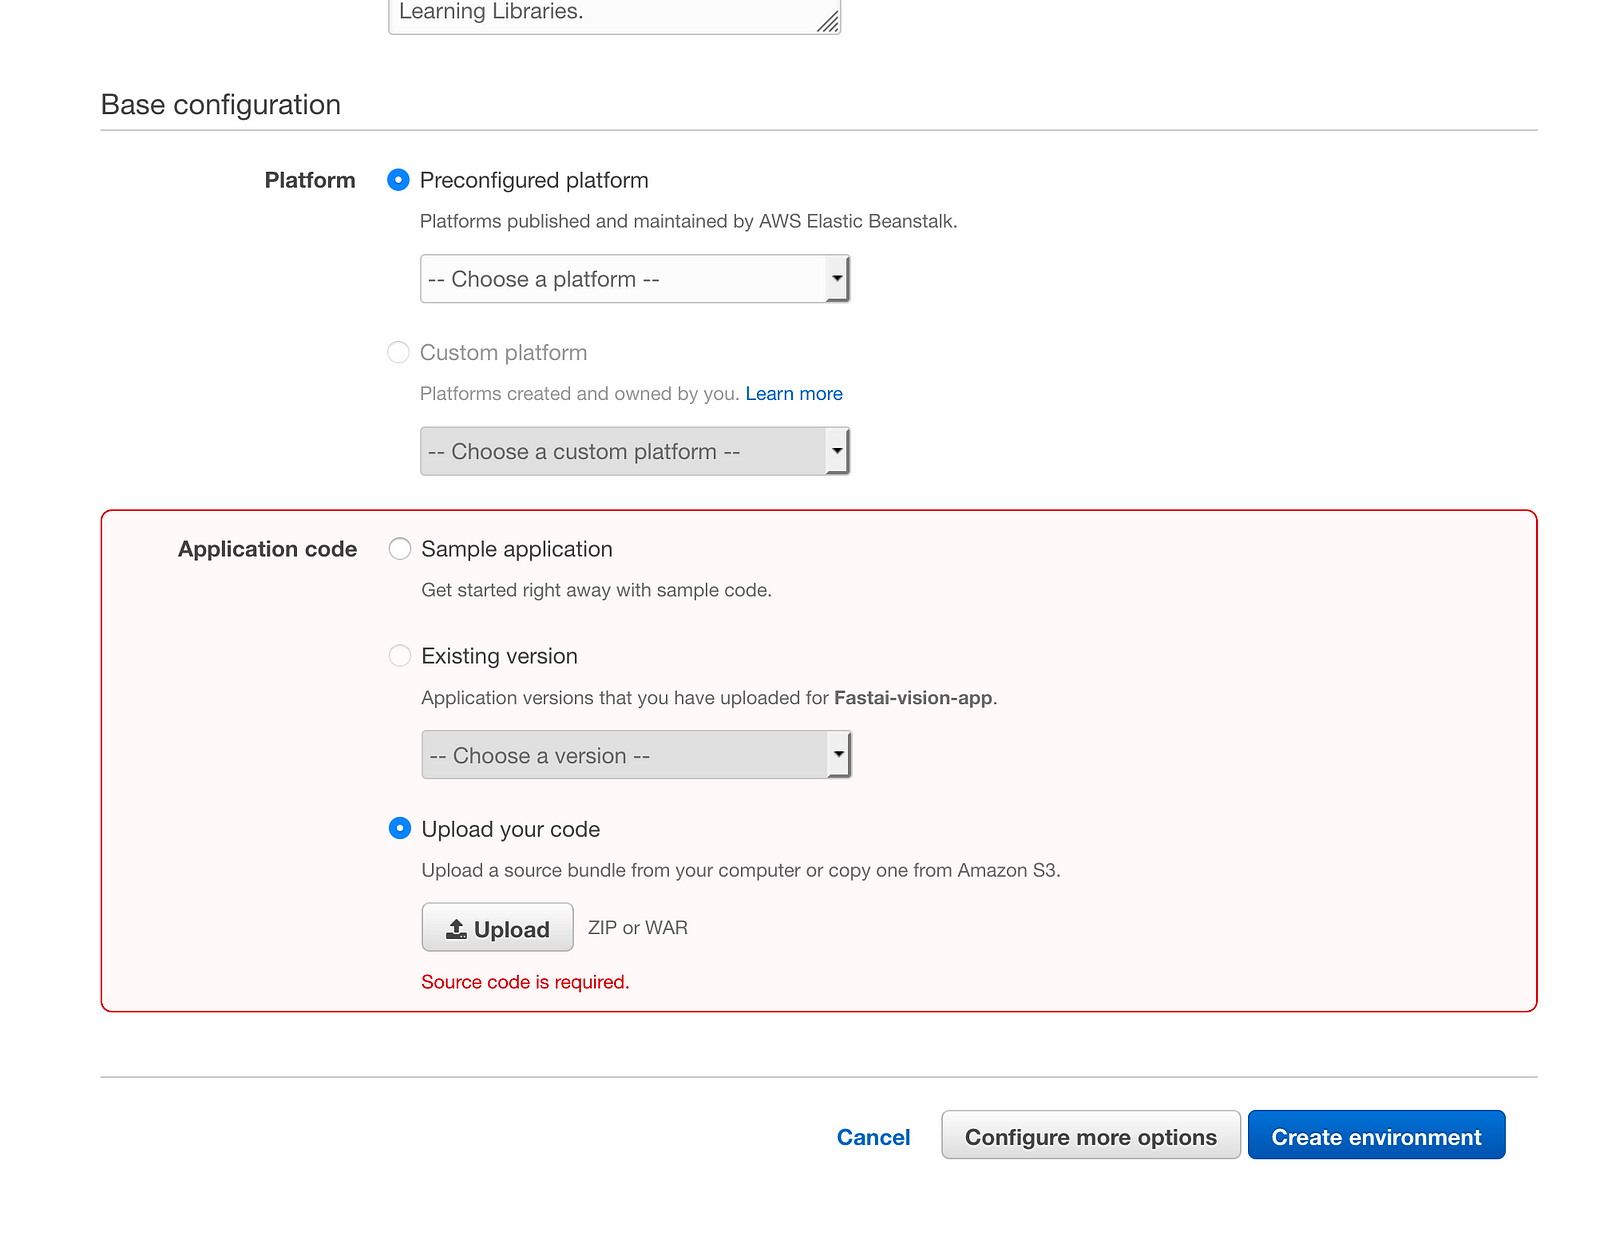
Choose Upload our code option and click upload, then you will be presented with following screen. Before uploading your starter pack Please read instructions below!
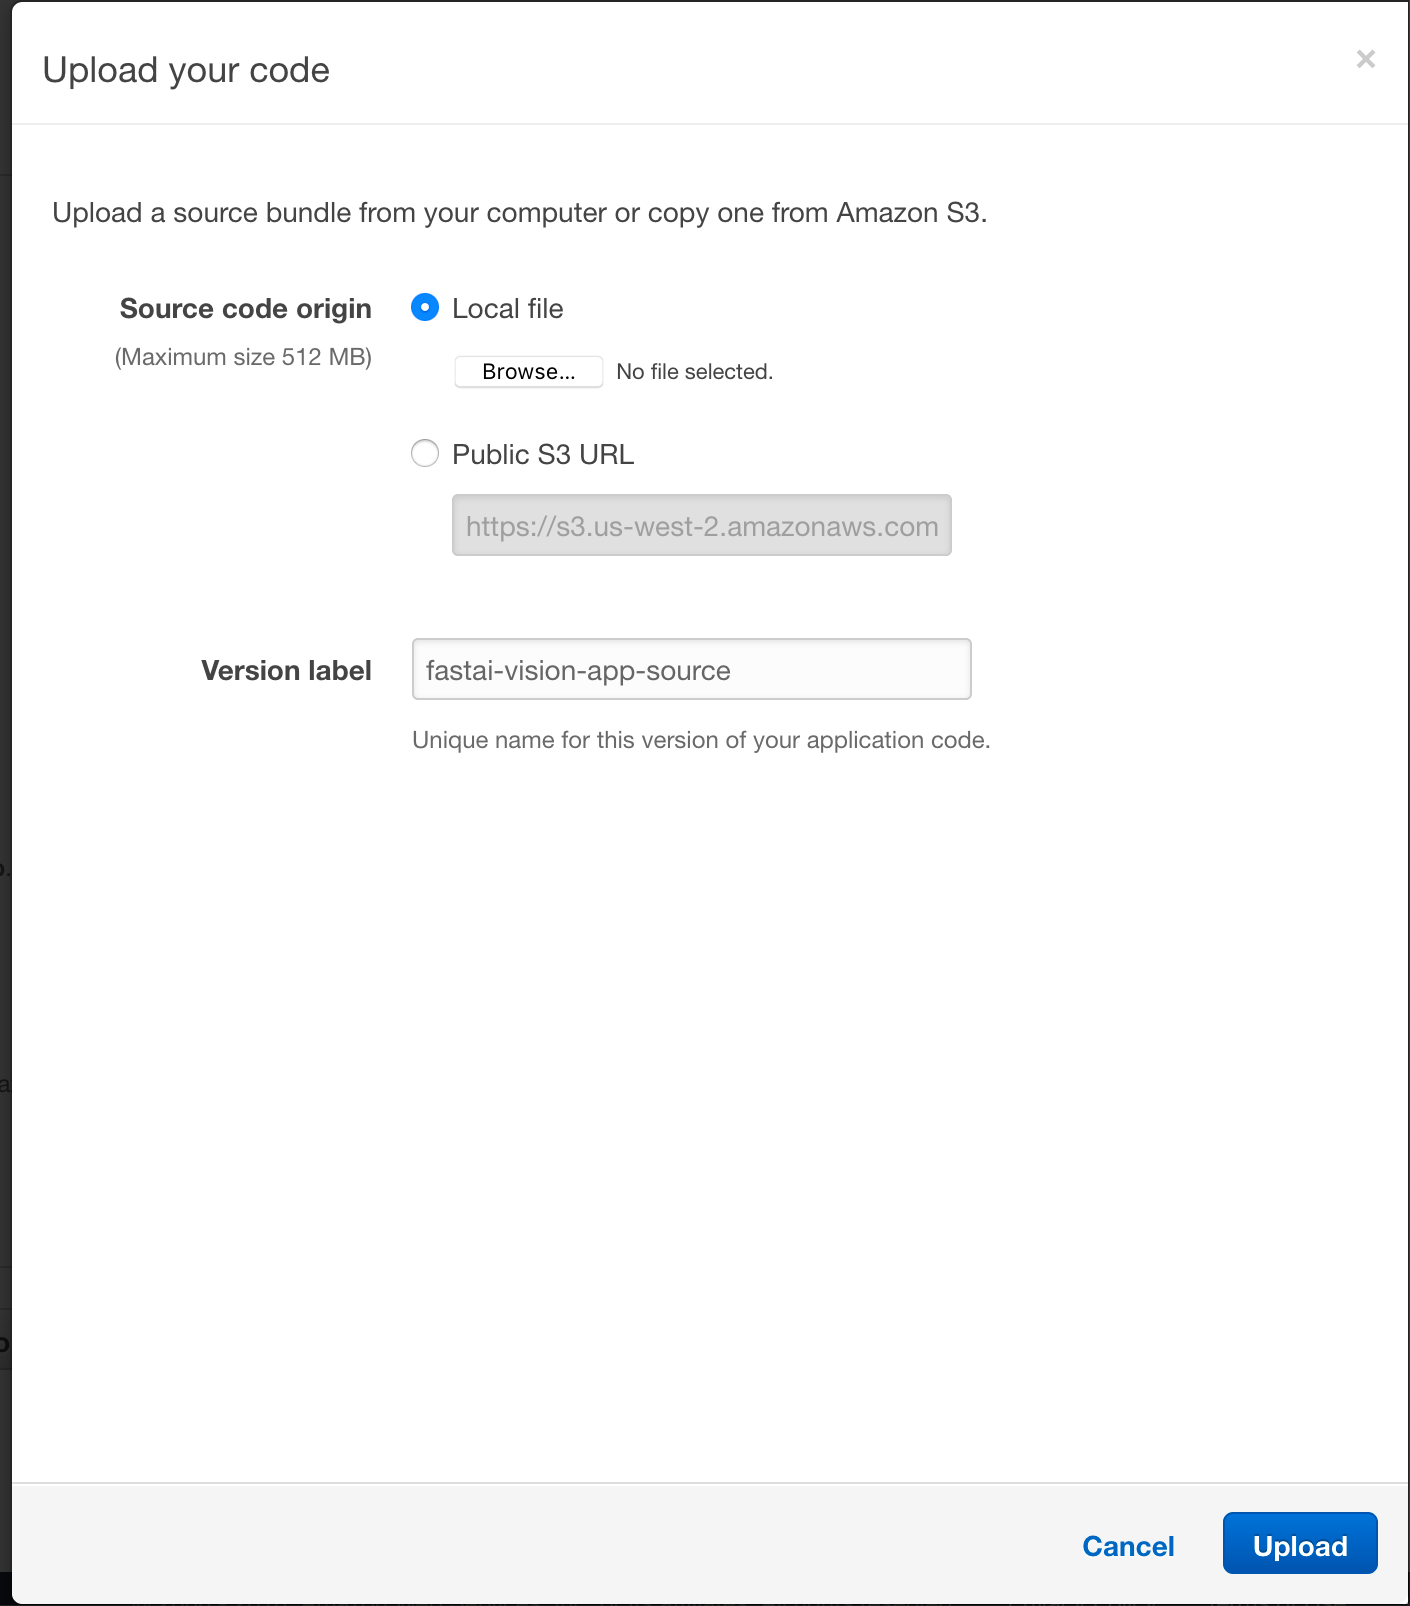
IMPORTANT: For some weird reason you can just upload direct zipped file of our web app folder, you have to zipped contents under your web app folder directly, I guess because AWS Beanstalk need to see Dockerfile found directly inside root of zipped file, not under web app folder. So, to do do this, just open web app in your local machine and zipped content directly. This is how I did in Mac OS X.
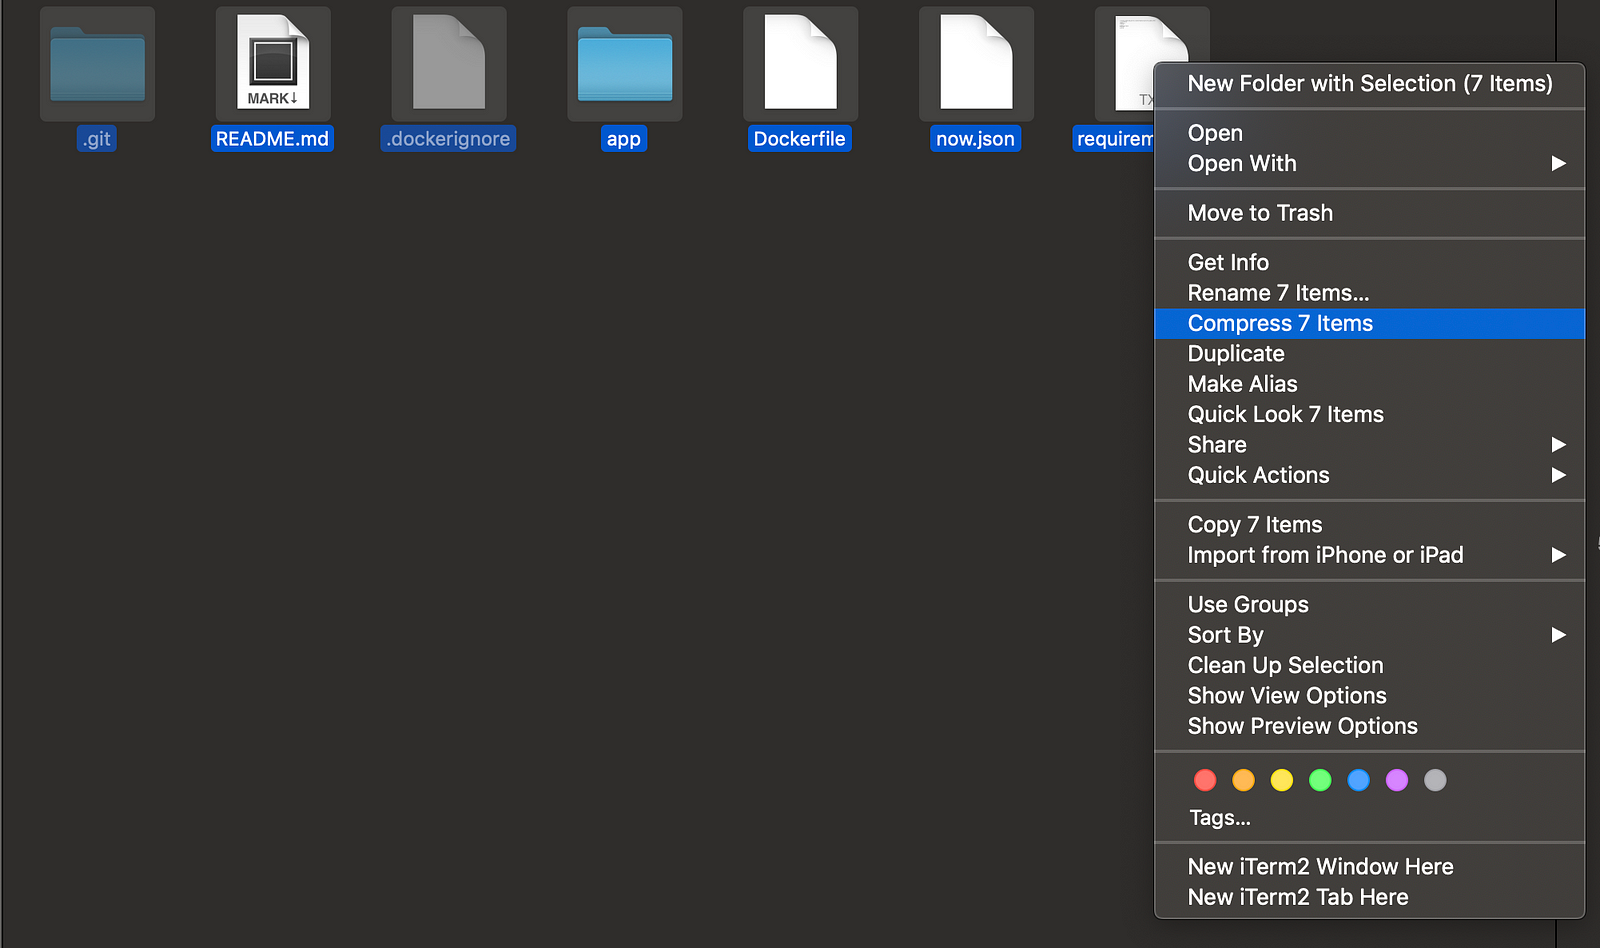
Optional: If you have run “server.py ” locally on you machine, then you may have downloaded model files already under directory app > static > model > “model.h5” or “model.pth” , in order to keep this compress zipped file smaller in size, you can delete those model file. However, do note, AWS Beanstalk do allow uploading file size up to 512 MB.
IMPORTANT: Don’t press Create Environment! we have to use Configure More Options.
These are essential steps, In order, to make our Web App deploy smoothly on AWS Beanstalk, Click Configure More Options, It will open a new page, where we have to change Configuration presets section to Custom Configuration option, It will look like below.
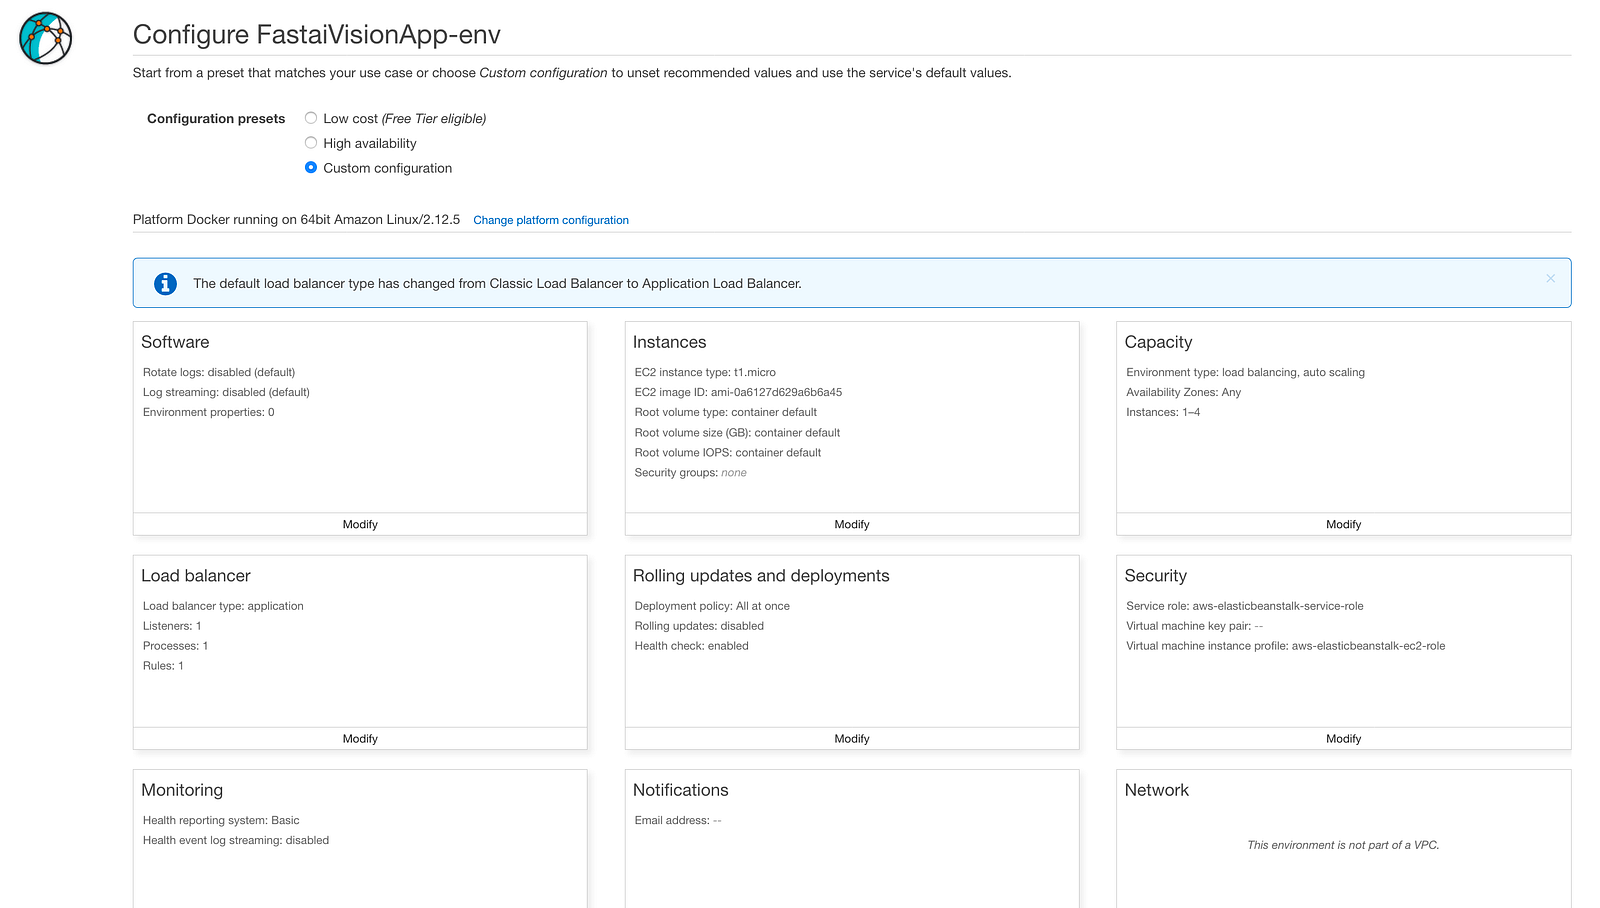
Then go down to first Section > Software, click Modify , It will open page like below, Change Proxy server from “Nginx” to None. Leave everything else unchanged and press save.
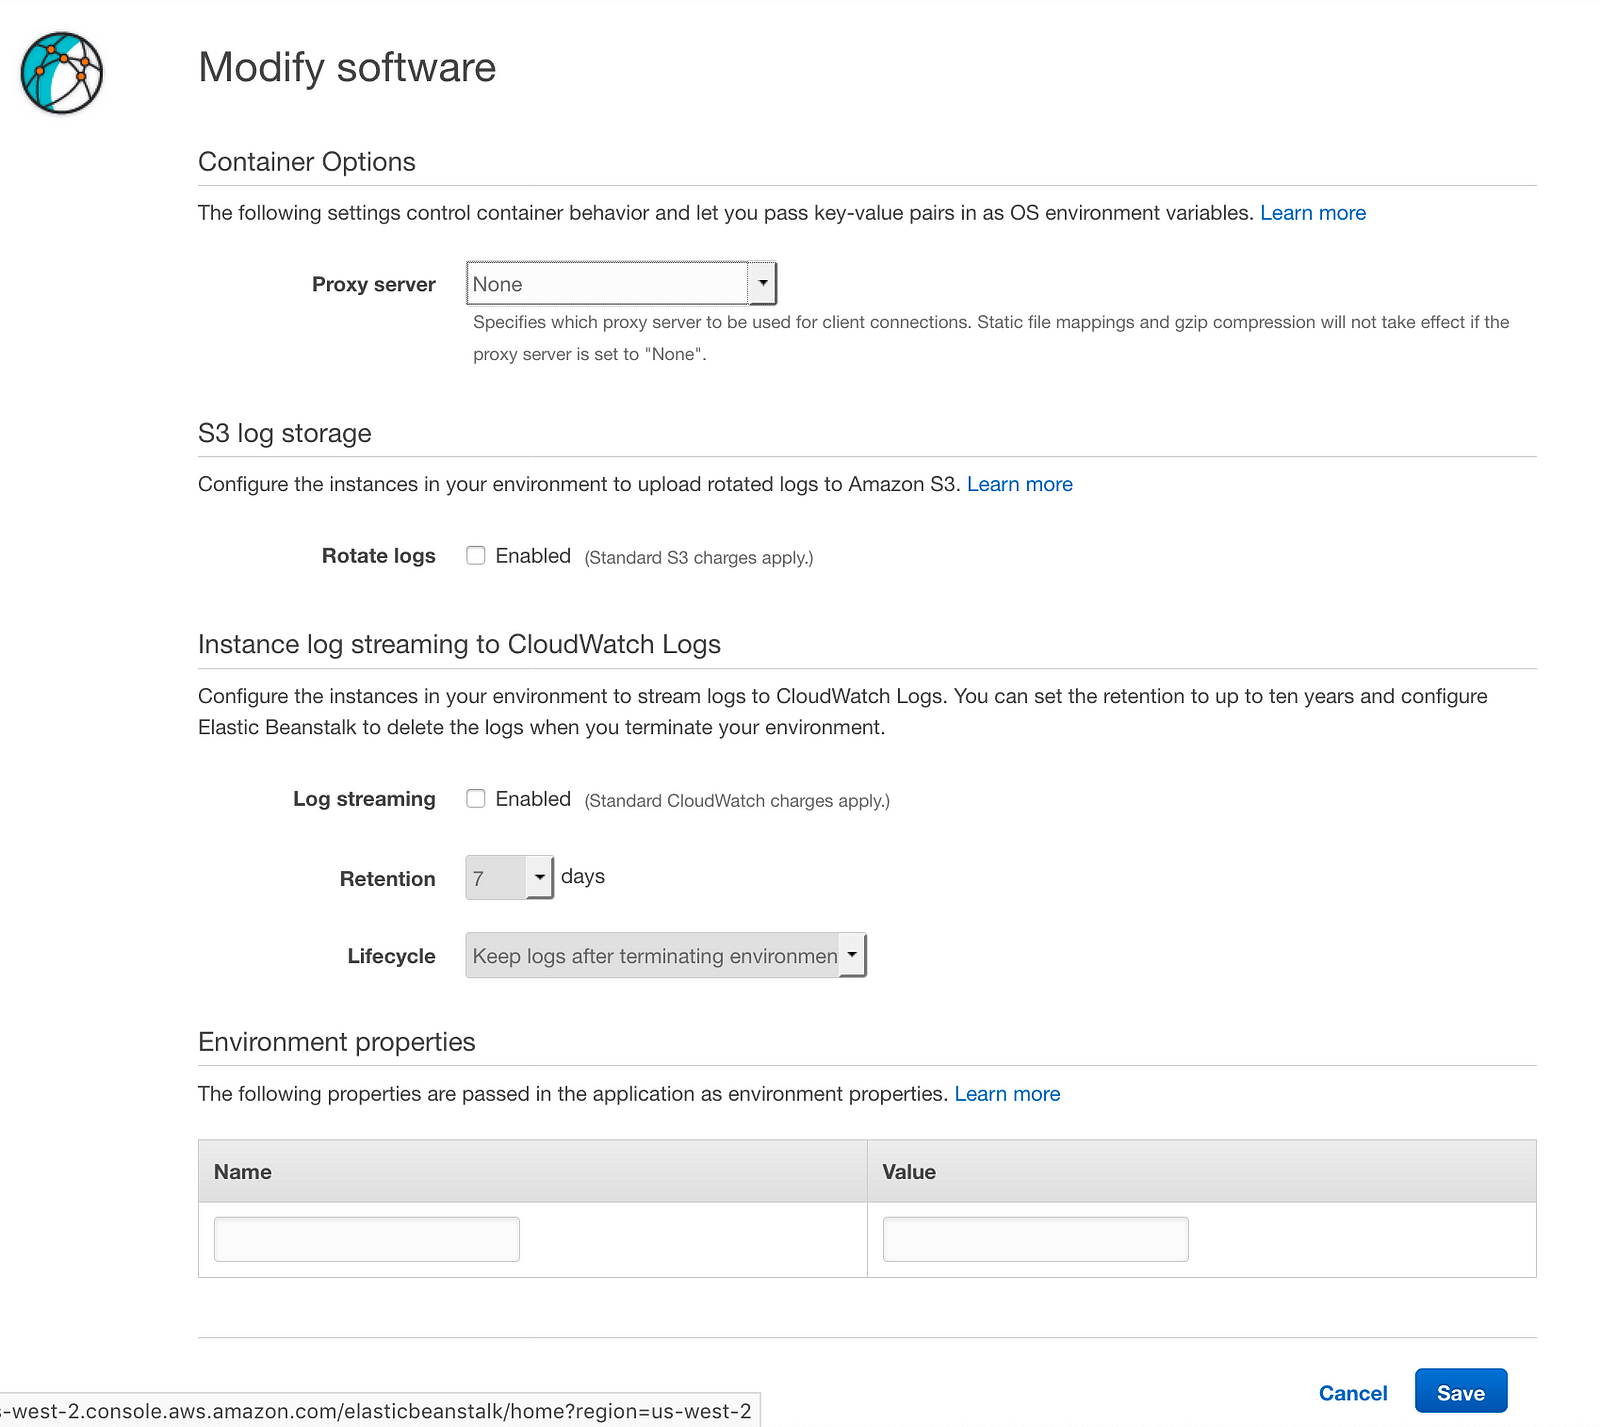
After Save You will be back to Configuration page, Here go down to second Section > “Instances”, click “Modify” , It will open page like below, Change “Instance type” from “t1.micro” to “t3.small”. Leave everything else unchanged and press save.
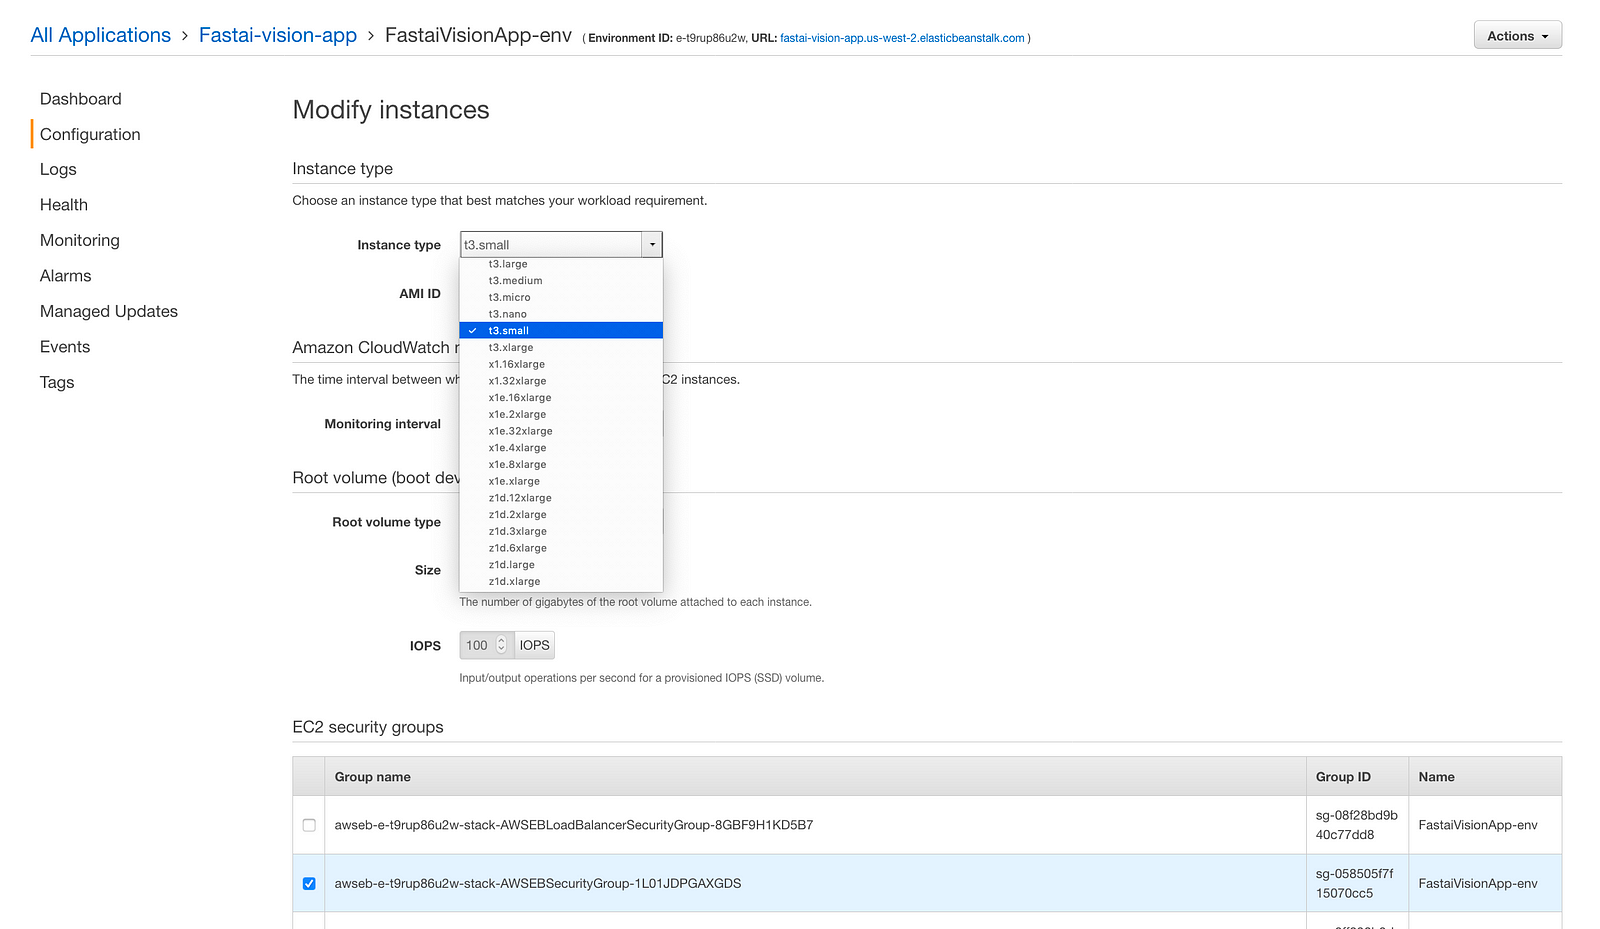
That’s it for custom configuration, now press Create Environment on application console page. After click you will see a screen showing log files entries of AWS BeanStalk deployment.
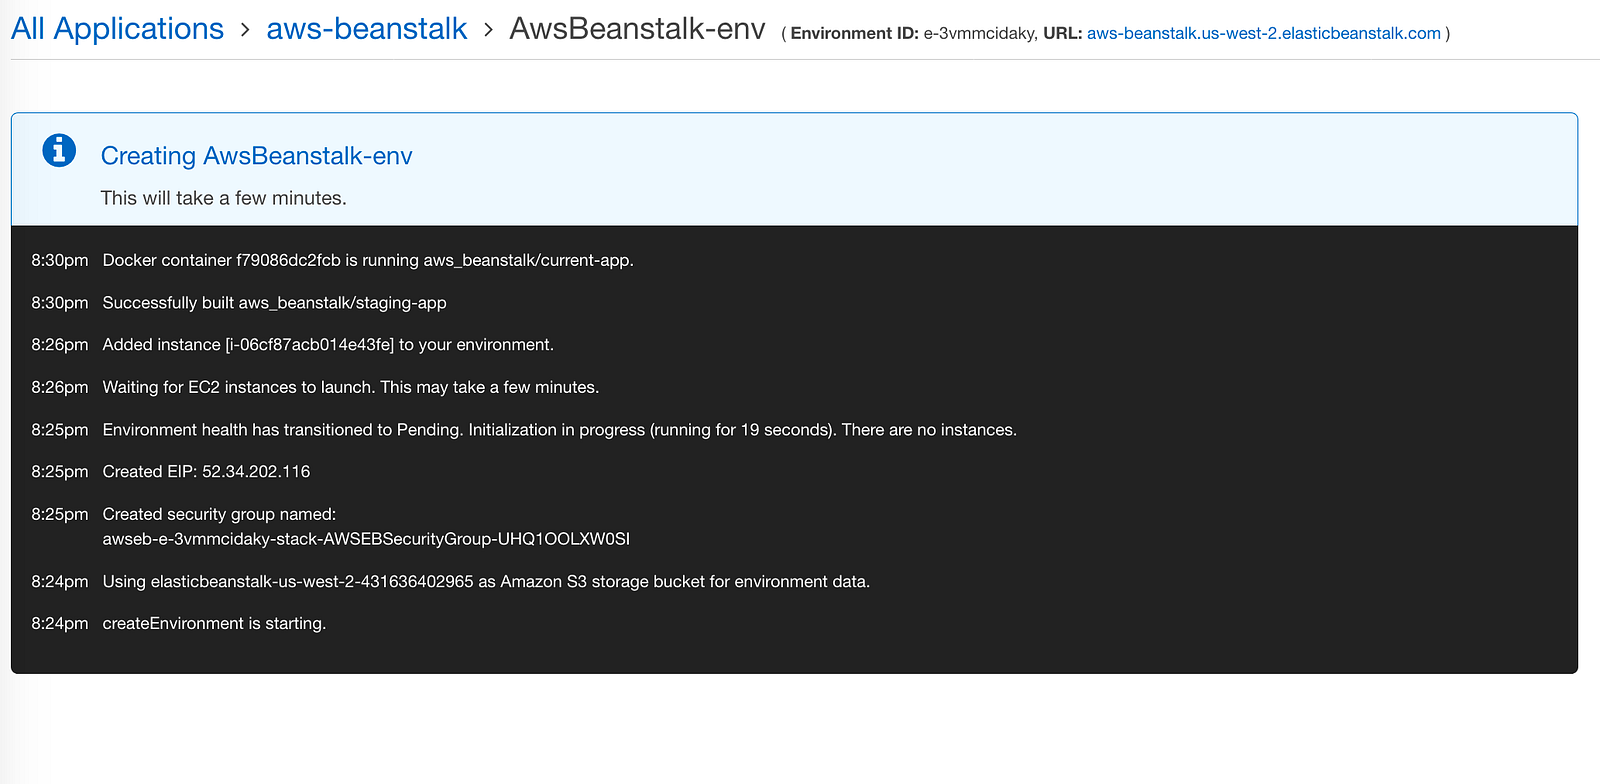
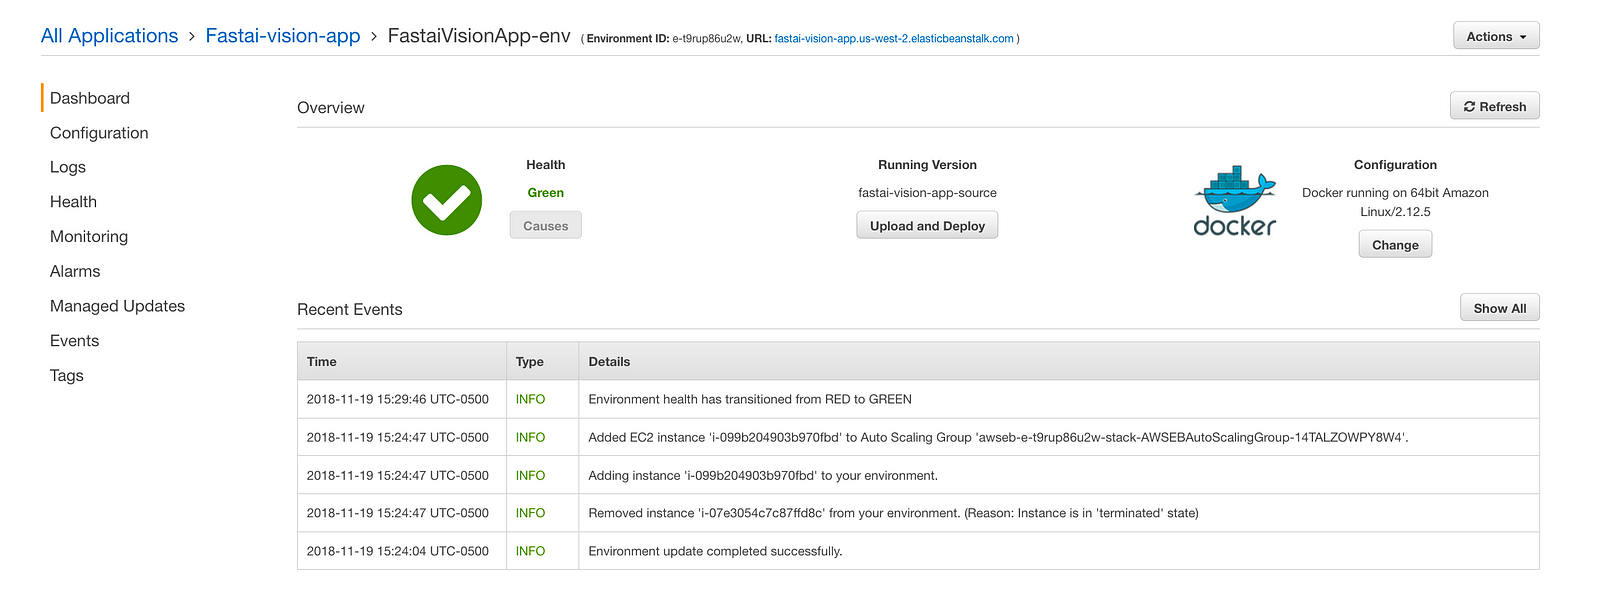
After 10–15 minutes, you will see dashboard like this, which will show Health as “Green” and detail logs for each stage.
Test the URL of your working app
To see your final app open http://YOUR_APP_NAME.AWS_REGION_HERE.elasticbeanstalk.com or click URL provided on your applicaiton dashboard.
Local testing
In case you want to run the app server locally, or make any changes to the above steps:
python app/server.py serve
Go to http://localhost:8080/ to test your app.
Thanks to Pankaj Mathur for this guide, and Simon Willison for sample code.