Fast.ai Deep Learning Course v3 on Gradient° Notebooks
This is a quick guide to starting v3 of the Fast.ai course. With Gradient, you get access to a Jupyter Notebook instance in less than 2 minutes, without complicated installs or configuration.
Gradient is built on top of Paperspace, a GPU-accelerated cloud platform.
If you are returning to work and have previously completed the steps below, please go to the returning to work section.
Pricing
Note: Paperspace introduced a Free Tier of free GPU and CPU instances. To use them choose Free-GPU or Free-P5000 (recommended) in step 2.6 Create Notebook.
Notebooks are billed while they’re running (per second!) and the rate is dependent on the Instance Type selected. Notebooks must be stopped to end billing. See below for free GPU credit! 💰 Note: Consider using new Gradient “preemptible” instances which can save you money during the course.
Step 1: Create an account
To get started, create an account here and confirm your account by clicking the verification link in your inbox.
Step 2: Create Notebook
-
Login and select Gradient > Notebooks.
-
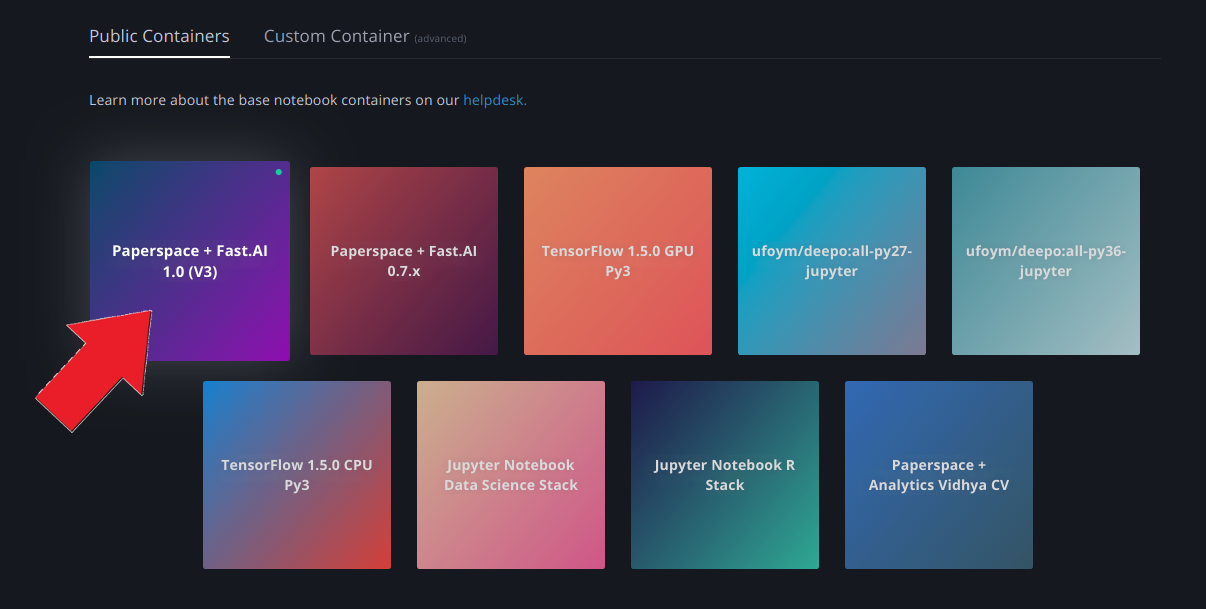
Select the Paperspace + Fast.AI 1.0 (V3) base container.
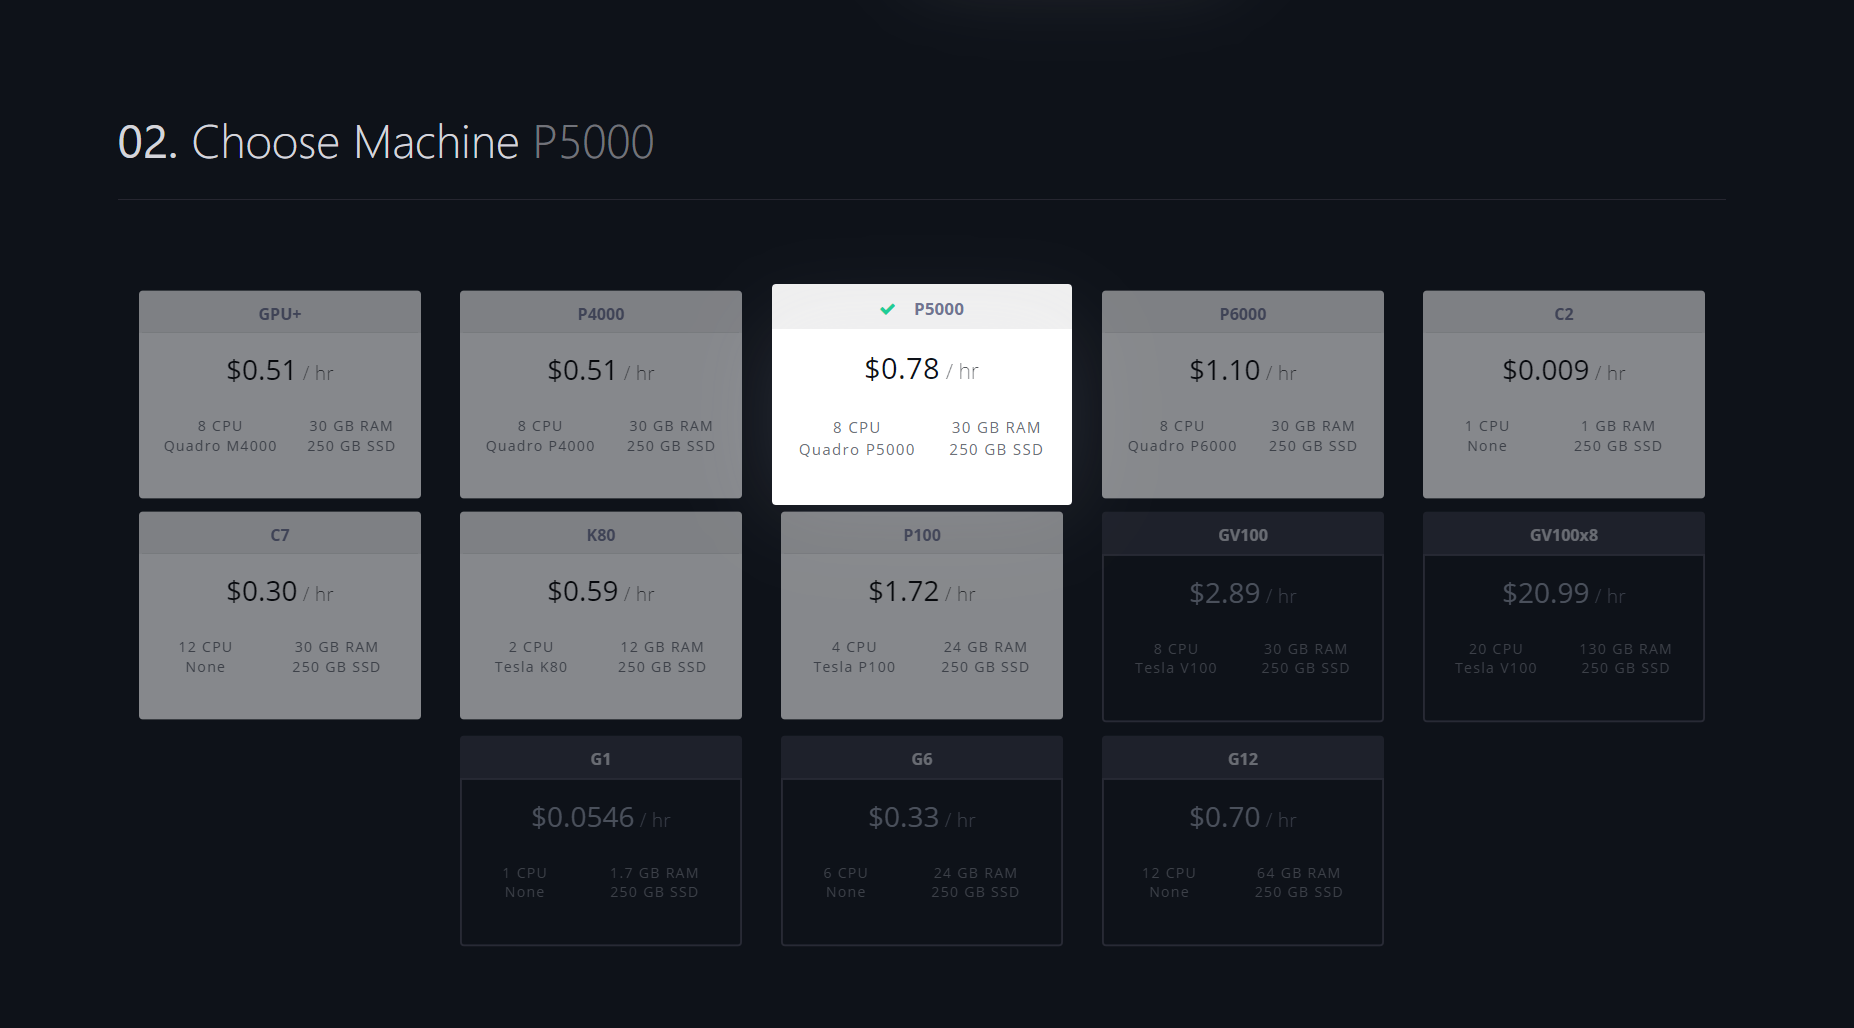
- Select the type of machine you want to run on.
Important note: remember that you can change the machine type at any time. This means you can start out running on an inexpensive machine, and then, whenever you want, switch to a much more powerful (and more expensive) one to execute code as efficiently as possible. Machine type is independent of your notebook. When you return to work, the machine type should self-select to whatever you type you last used. But it’s a good idea always to check! This will prevent billing and performance surprises. For more information, please see returning to work.
-
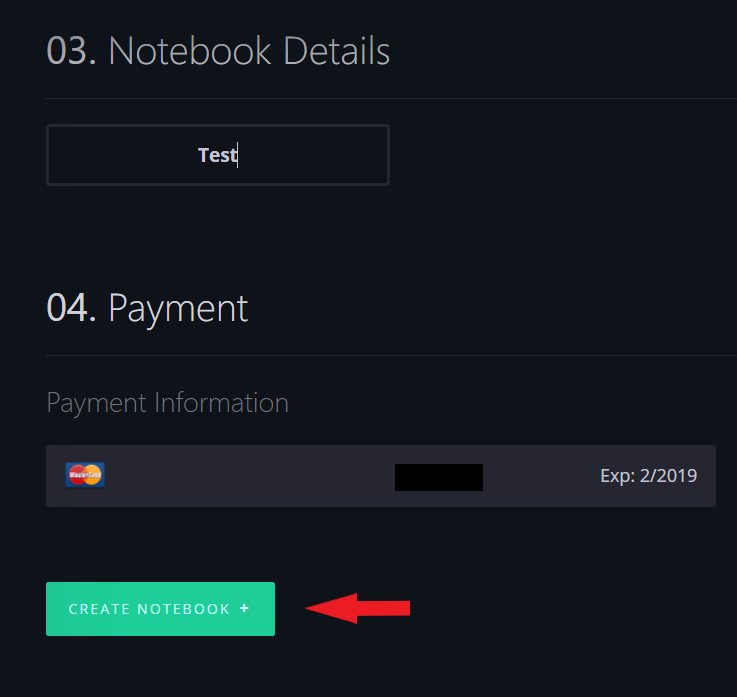
Name your Notebook (optional)
-
Enter your payment details (if you’re new to Paperspace). Even if you have a promo or referral code, all active Paperspace accounts must have a valid credit card on file. You’ll be able to enter your promo code later.
-
Click Create Notebook
Your Notebook will go from Pending to Running, and will be ready to use :star2:.
When you click Create Notebook, that will start your Notebook and your billing for utilization will begin. To stop billing, you must stop your Notebook. Notebooks will automatically shut down after 12 hours.
Step 3 : Update the fastai library
Before you start working you will need to update the fastai library and lesson notebooks. To do this you will have to access the terminal. You can do this by clicking in ‘New’, ‘Terminal’.
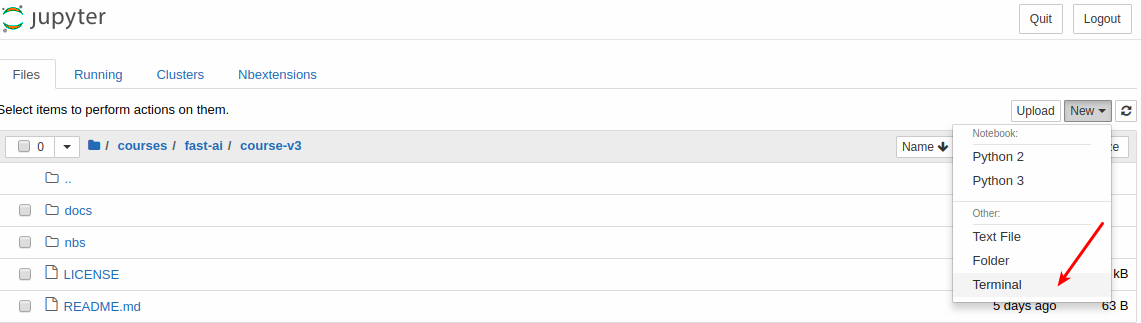
Once you click on ‘Terminal’ a new window should open with a terminal. Type:
pip install fastai --upgrade
then
cd course-v3
git pull
Now you should close the terminal window.
Step 4: Start learning Fast.ai!
You should now have a running fast.ai notebook. It might take a few minutes to provision, but once it’s running you just have to click “Open” to access your Jupyter notebook.

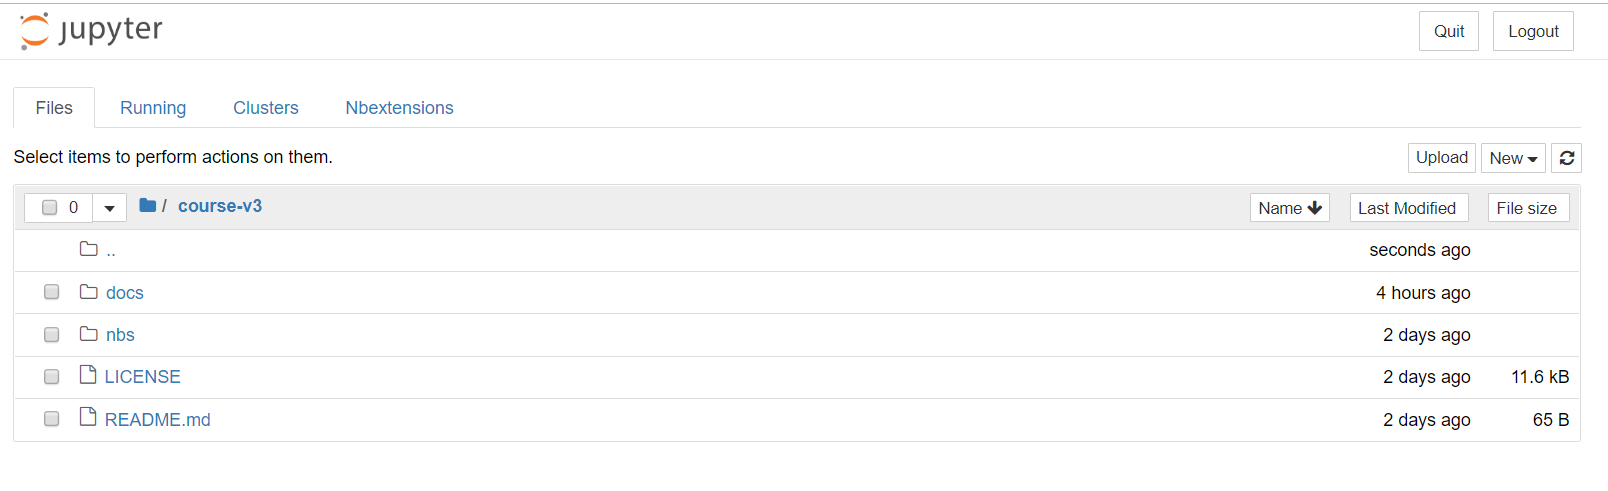
Next from your jupyter notebook, click on ‘course-v3’ and you should look at something like this:
Go back to the first page to see how to use this jupyter notebook and run the jupyter notebook tutorial. Come back here once you’re finished and don’t forget to stop your instance with the next step
Step 5: Stopping your Notebook
Just click stop. This will end the billing session.
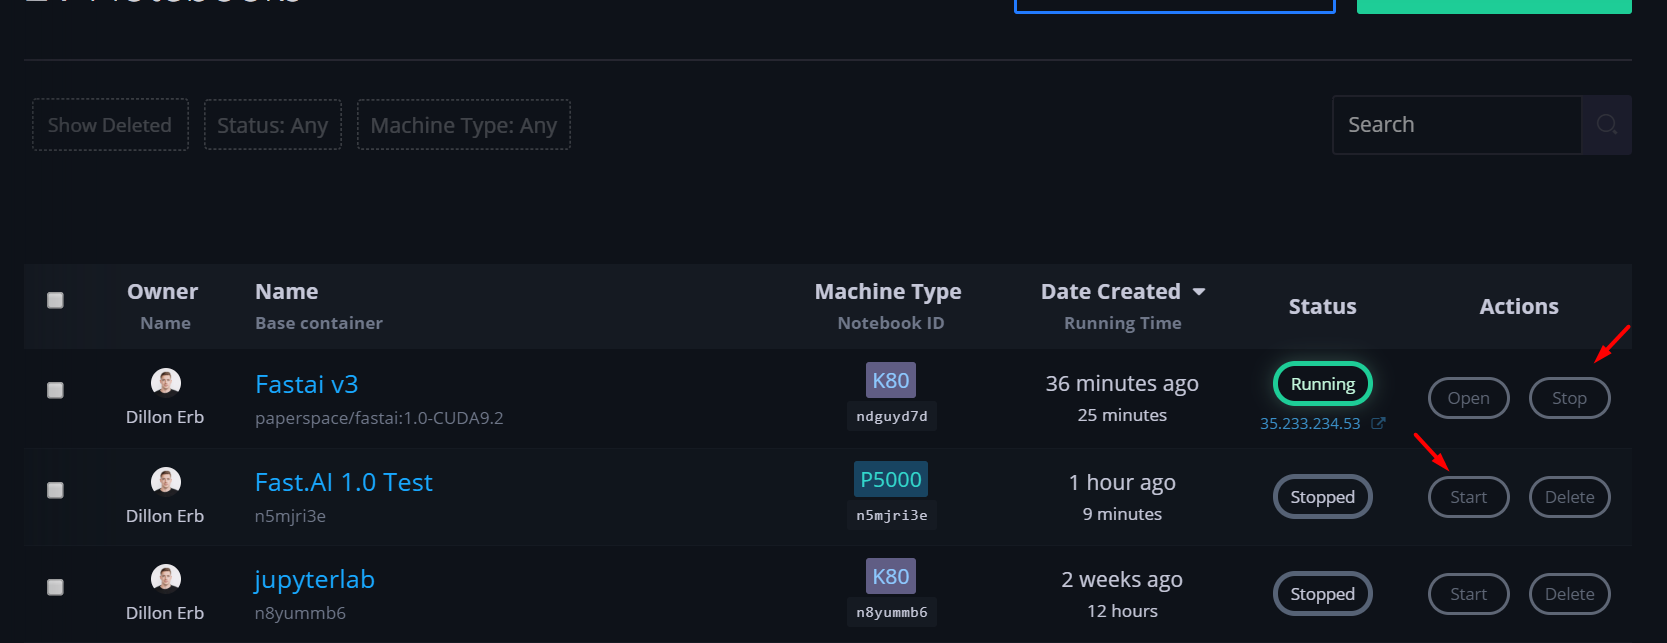
NOTE: you will be charged for the time that your notebook is running. You must stop the notebook to stop incurring charges.
For more details, updating the course and the fastai library see “Returning to work”.
Additional considerations:
Managing Data
The /storage folder is your Persistent Storage. Files placed here are available across all Notebooks, Jobs, and Linux VMs (currently free of charge). This repository is perfect for storing datasets, models etc. Note: Persistent Storage is region specific (you’ll see the storage region options when creating Notebooks and Jobs).
Promotional credit
Paperspace provides $10 of free Gradient° credit. This code is to be used for Fast.ai students only. In your console, click on Billing and enter the promo code at the bottom right. The promo code for this course is: FASTAIGR19. Note: the code is valid until Jan 1, 2020
Note: If you opt for a Gradient 1 Subscription, promotional credit does not apply. Learn more about Gradient Subscription levels here.
Where to get help
Questions or issues related to course content, we recommend posting in the fast.ai forum.
For Paperspace-specific support, check out the rest of the Gradient Help Center or submit a support ticket with this form.
Many thanks to Dillon Erb for writing this tutorial