This is a quick guide to starting v3 of the fast.ai course Practical Deep Learning for Coders using Amazon SageMaker.
If you are returning to work and have previously completed the steps below, please go to the returning to work section.
We will use AWS CloudFormation to provision all of the SageMaker resources including the Notebook instance, Notebook Lifecyle configuration and IAM role. By default it will provision a SageMaker notebook instance of type ml.p2.xlarge which has the Nvidia K80 GPU and 50 GB of EBS disk space.
Pricing
The instance we suggest, ml.p2.xlarge, is $1.26 an hour. The hourly rate is dependent on the instance type selected, see all available types here. You will need to explicitely request a limit request to use this instance or the ml.p3.2xlarge instance, here Instances must be stopped to end billing.
Getting Set Up
Creating the SageMaker Notebook Instance
-
Visit the AWS webpage and click on ‘Sign In to the Console’. Next, enter your credentials if you are signing in or e-mail, account name and password if you need to sign up.

If you do not have an account, the button to press will say ‘Sign up’ instead of ‘Sign in to the Console’. If you are signing up you will also need to set your credit card details. This will be the credit card to which all the charges of the instance usage will be applied (if you have free credits you will not be charged until they are over). Note that you will also need to provide a phone number that will be called to verify your identity.
-
Once you have an account and are logged in we are ready to create all the SageMaker resources using CloudFormation. To lauch the CloudFormation stack click the Launch Stack button for the closest region to where you live in the table below .
-
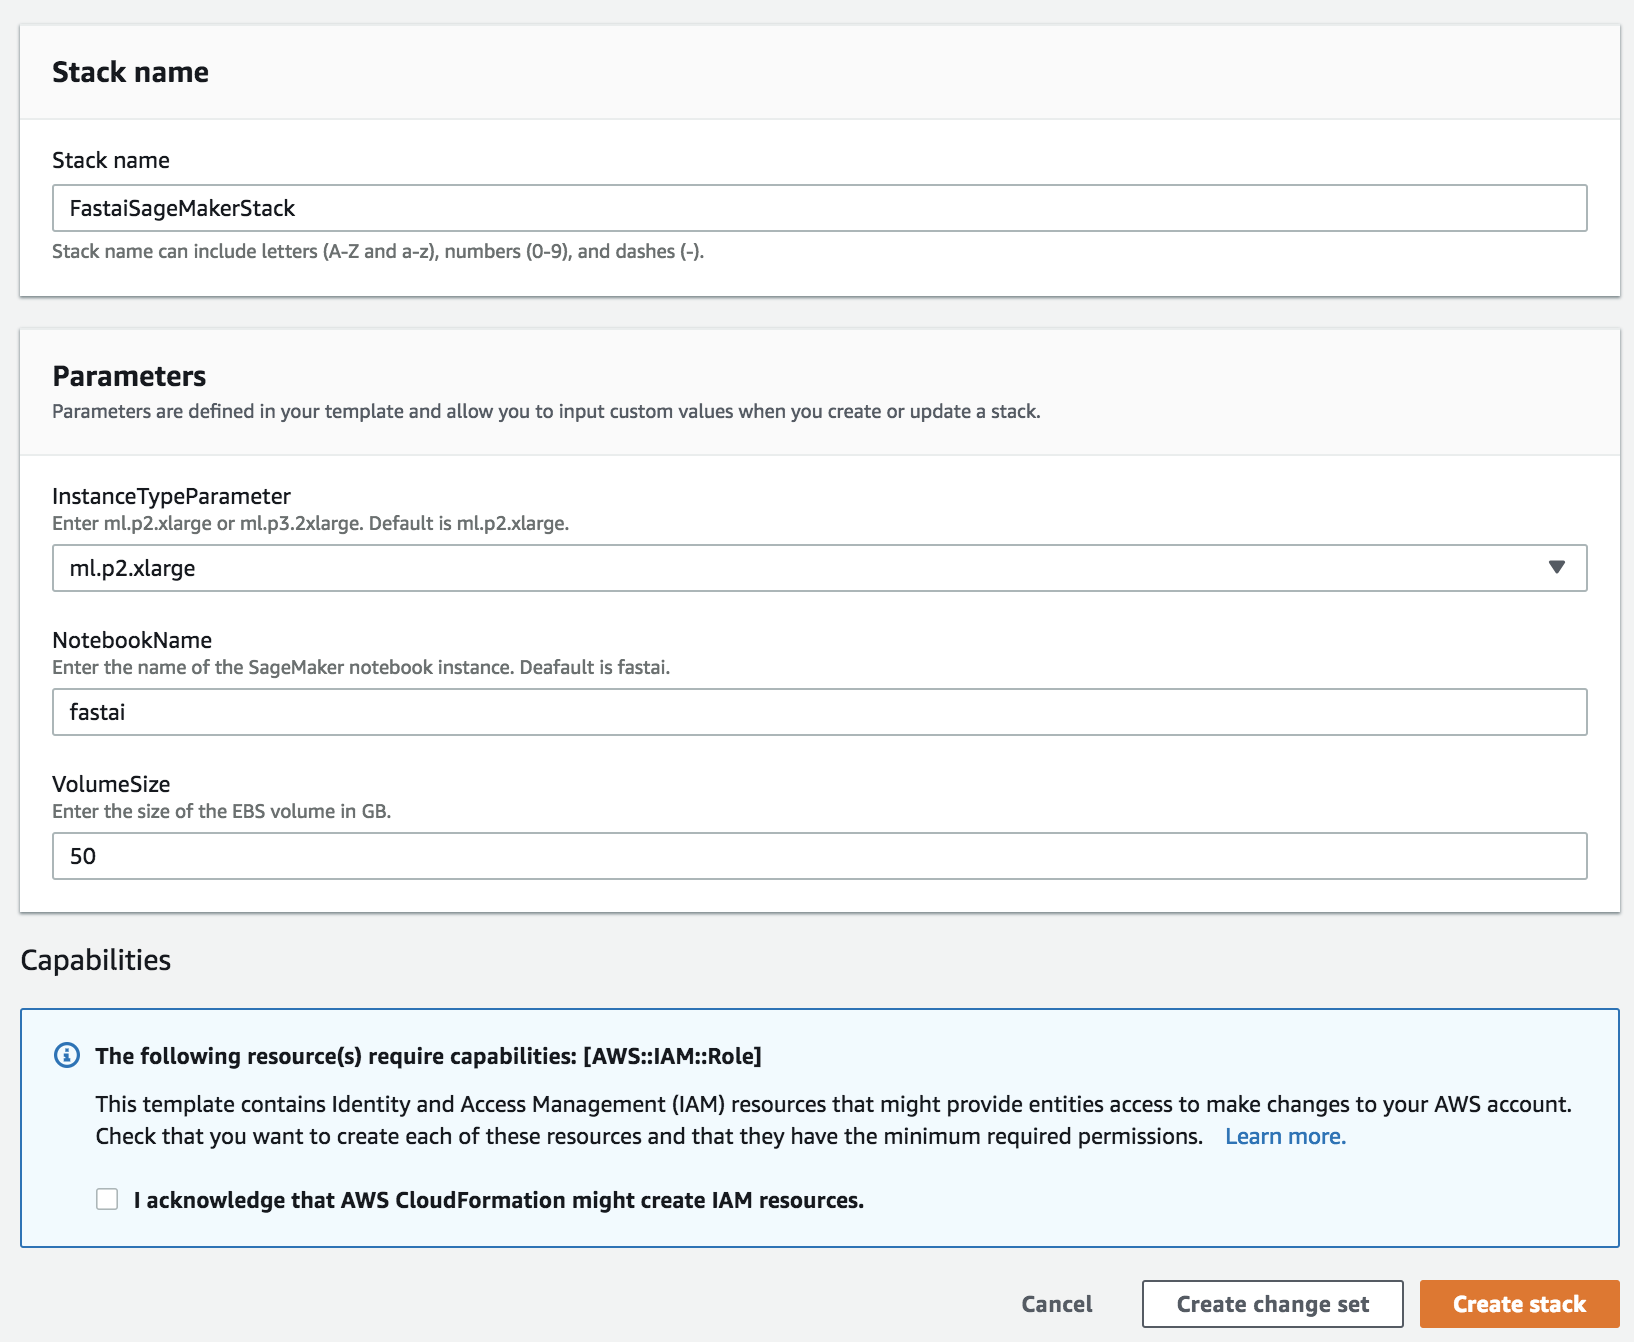
This will open the AWS CloudFormation web console with the template to create the AWS resources as per the screenshot below. Take a look at the input parameters and either accept the defaults or update them as necessary. Select the option box I acknowledge that AWS CloudFormation might create IAM resources. and then click the Create button to create the stack.

-
You will see the following CloudFormation page showing the stack is being created. Once the stack reaches the CREATE_COMPLETE state then open the AWS web console and click Services in the top bar, and type ‘sagemaker’. You can then click Amazon SageMaker.

-
On the left navigation bar, choose Notebook instances. This is where we create, manage, and access our notebook instances. You should see that your notebook instance named fastai status has the status InService as per the screenshot below.

-
Click on the Open Jupyter link to open your Jupyter web console.
Shutting down your instance
-
When you’re done, close the notebook tab, and remember to click stop! If you don’t, you’ll keep getting charged until you click the stop button.

To see how to open it again, update the course or the fastai library, go to the Returning to work page.
Troubleshooting installation problems
- If you do not receive a notifcation email after more than 15 minutes then there may have been a problem installing the fast.ai libraries and dependencies on your notebook instance. To troubleshoot, open the AWS console then click on the CloudWatch link (type cloudwatch in the search bar). Once you are in the CloudWatch console, navigate to Logs -> /aws/sagemaker/NotebookInstances -> fastai/LifecycleConfigOnStart or fastai/LifecycleConfigOnCreate to view the output of the installation scripts.
More help
For questions or issues related to course content, we recommend posting in the fast.ai forum.
